Give your Digital Twin a voice — connect an ElevenLabs agent to Pria using Custom LLM and deploy embeddable voice widgets
ElevenLabs Conversational AI lets you create voice agents with cloned or synthetic voices. By pointing an ElevenLabs agent at Pria’s Chat Completions API as a Custom LLM, your Digital Twin becomes the brain behind a real-time voice experience — no additional backend code required.
This integration combines ElevenLabs’ voice synthesis and real-time audio with your Digital Twin’s knowledge, personality, and tools.
Navigate to Conversational AI in your ElevenLabs account and create a new agent.
2
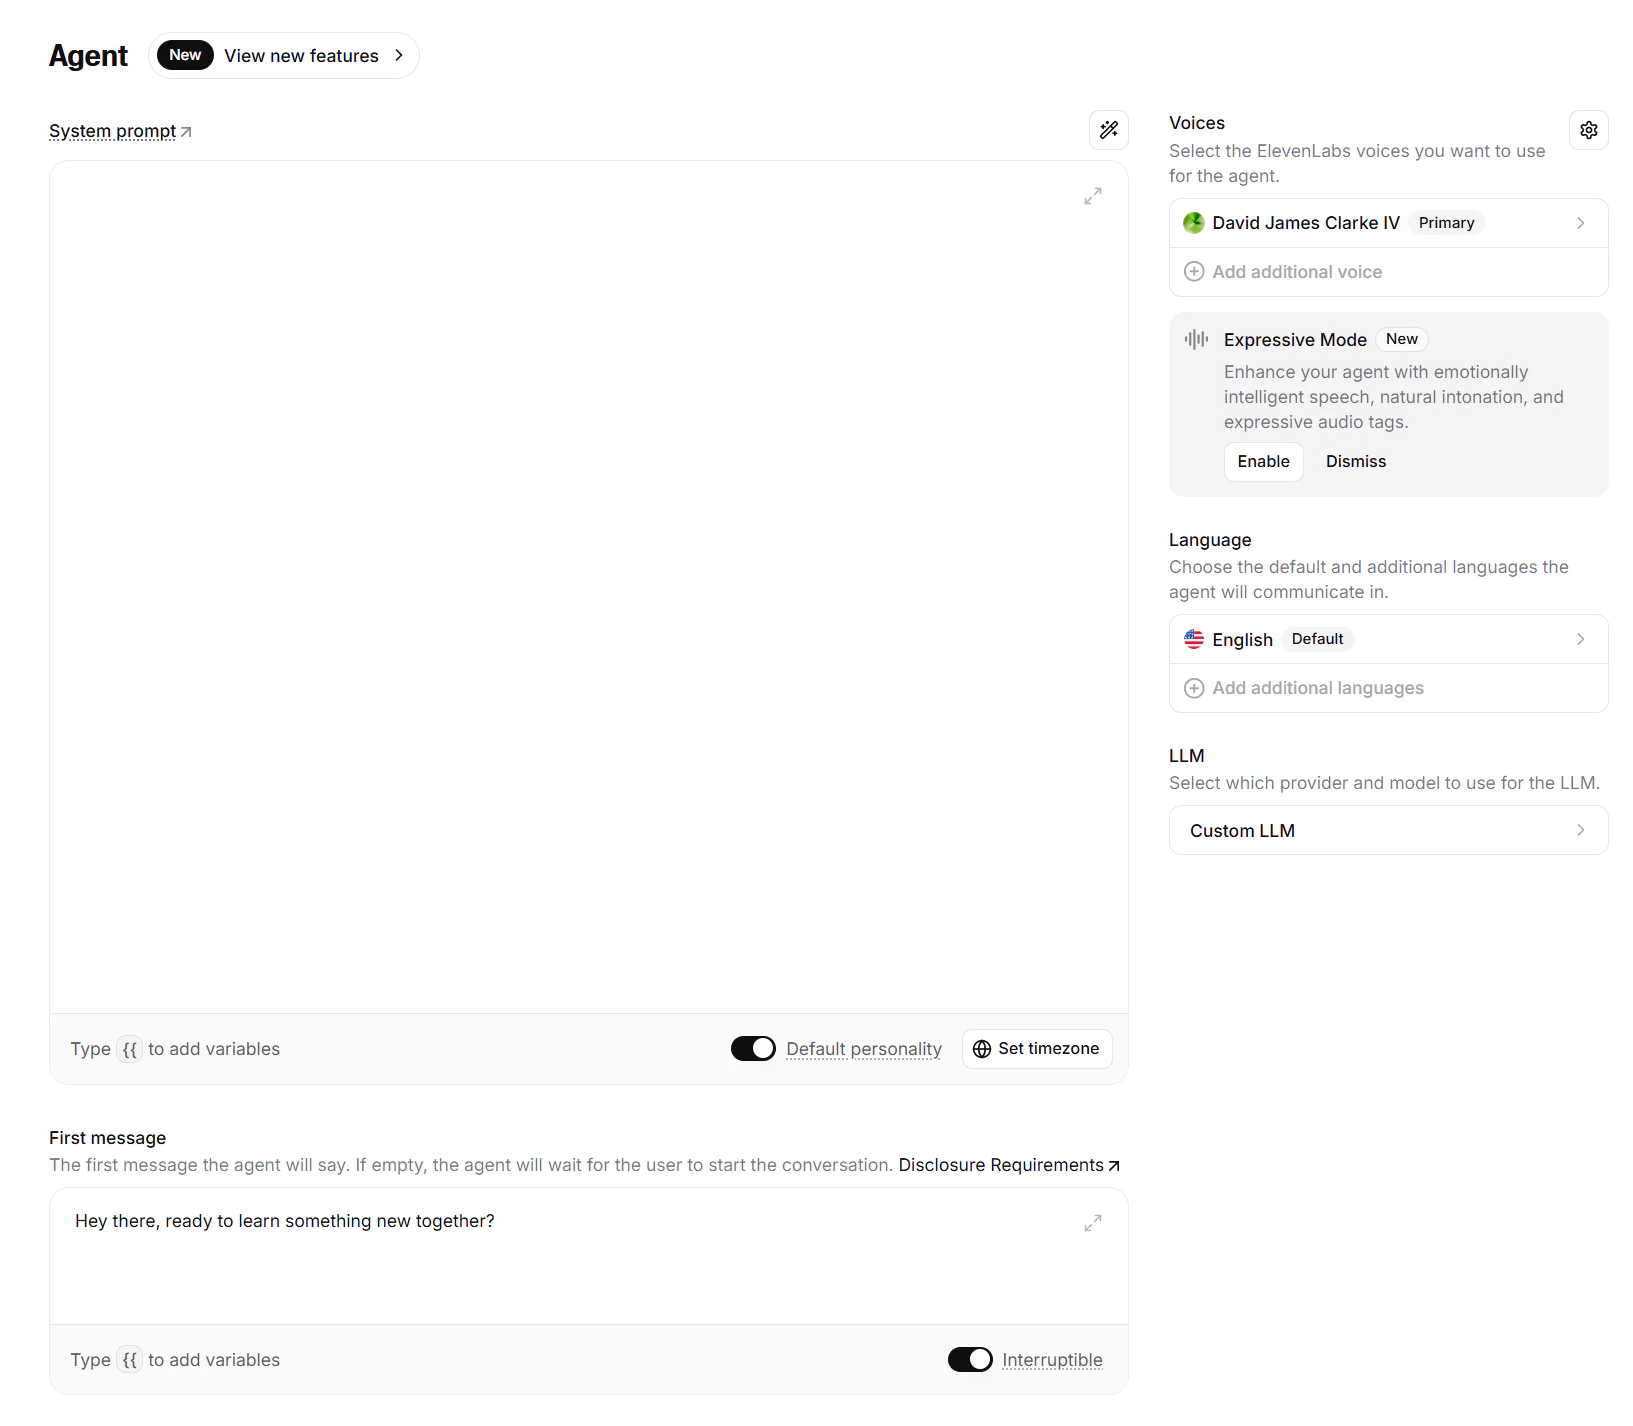
Choose a voice
Select a stock voice, or use ElevenLabs’ voice cloning to create a custom voice that matches your Digital Twin’s persona.
3
Configure the system prompt
The Digital Twin manages its own system instructions server-side. Use the ElevenLabs system prompt for voice-specific behavior only (e.g., greeting style, conversation pacing).
4
First Message
Type a greeting, for example Hey there, ready to learn something new together?
This is the core configuration — tell your ElevenLabs agent to use your Digital Twin as its language model.
1
Open LLM settings
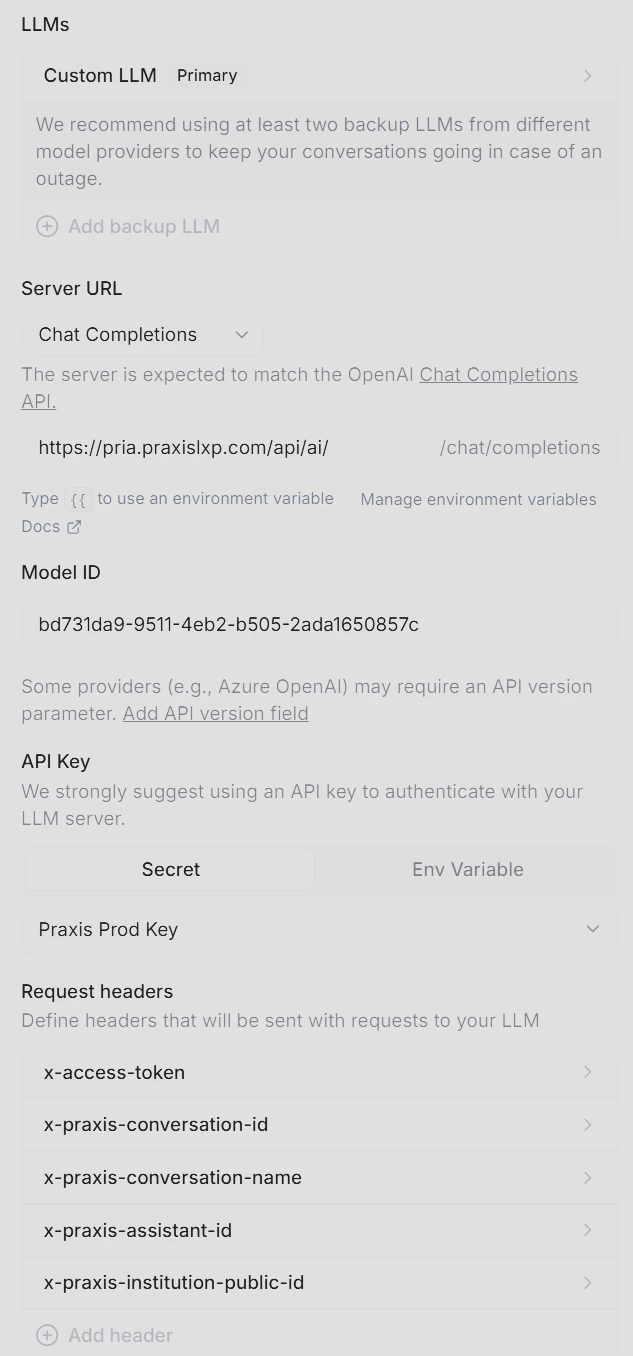
In your agent’s settings, go to the LLM section and select Custom LLM.
2
Set the Server URL
Enter your Chat Completions API base URL:
https://pria.praxislxp.com/api/ai
3
Set the Model ID
Enter your Digital Twin’s Public ID as the model:
e455529a-4f51-479e-94fc-bbebb41d19a1
The Model ID maps directly to the Digital Twin Public ID. ElevenLabs will include this in every request as the model parameter — exactly how the Chat Completions API expects it.
4
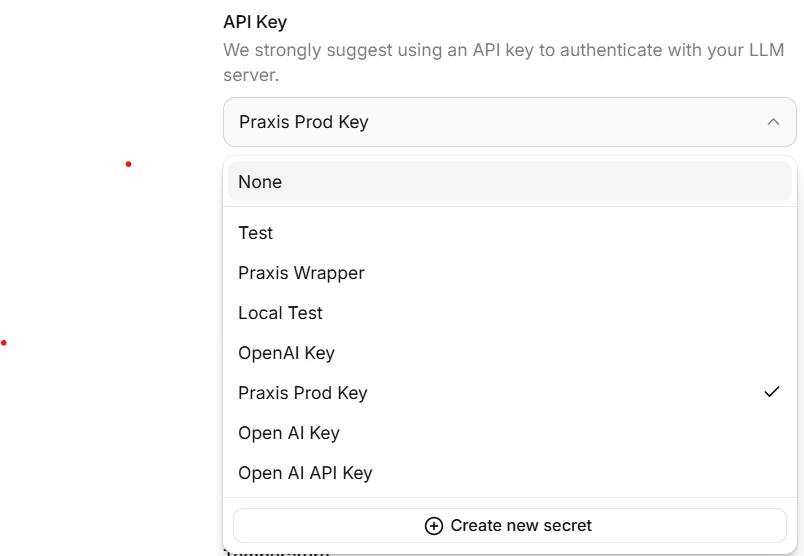
API Key
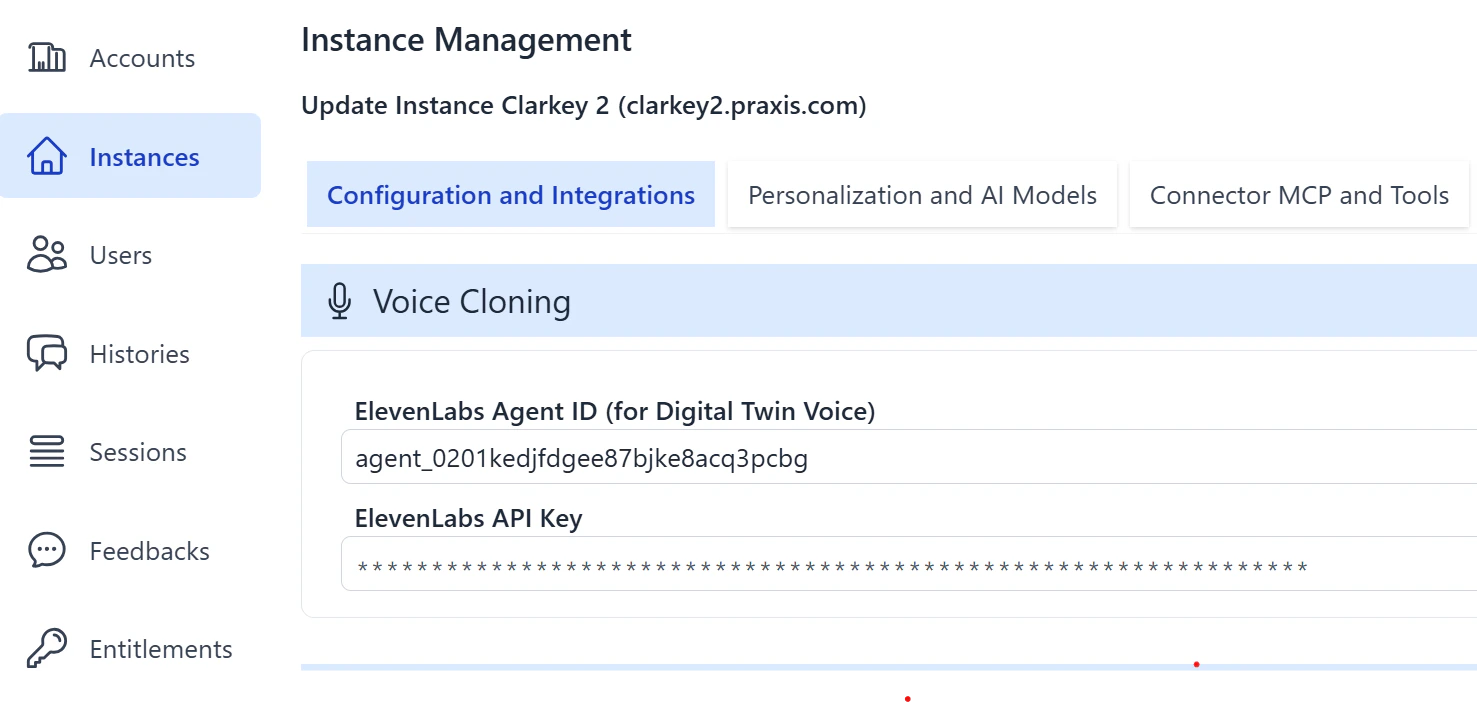
In the API Key section of your ElevenLabs custom-LLM dashboard, select your ElevenLabs API Key or create a new one.
You must also set this value in your Digital Twin configuration page in Praxis.
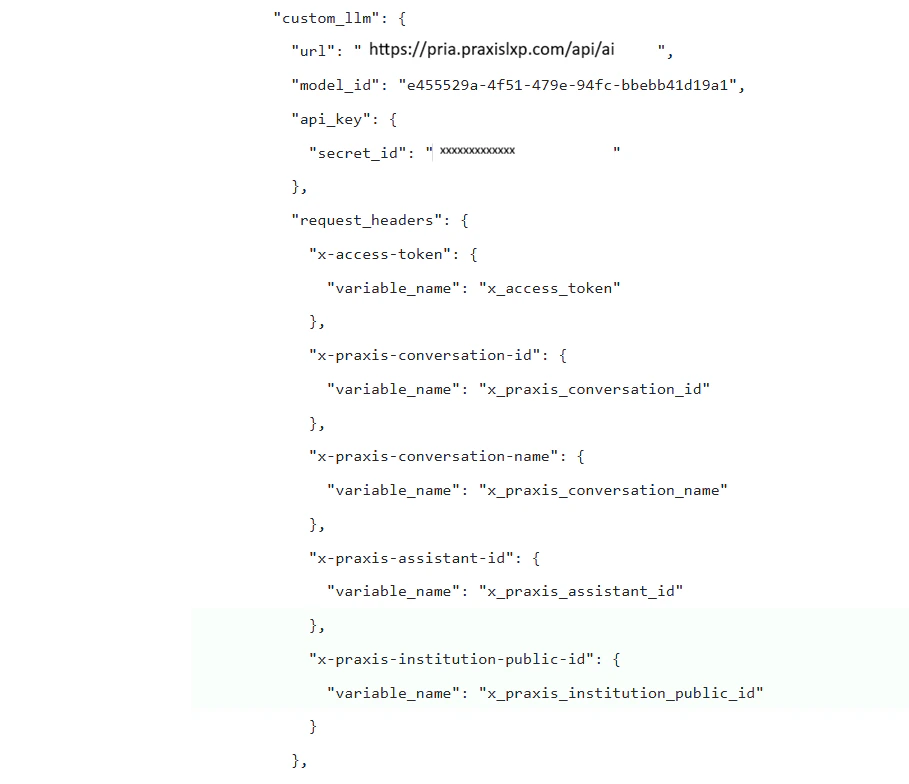
Dynamic variables let you pass user identity and conversation context from the client application through ElevenLabs to your Digital Twin. These are mapped to the x-praxis-* request headers that the Chat Completions API forwards to Praxis.
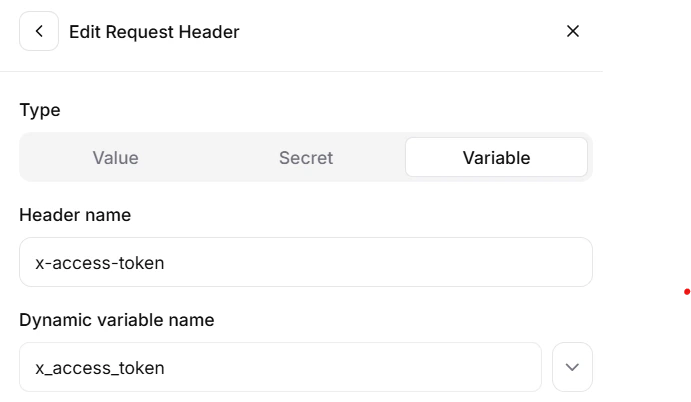
In your agent’s settings, define the custom header mapping to dynamic variables:
Header
Description
Dynamic Variable
x-access-token
Praxis JWT for user authentication
x_access_token
x-praxis-conversation-id
Numeric conversation/course identifier
x_praxis_conversation_id
x-praxis-conversation-name
Human-readable conversation name
x_praxis_conversation_name
x-praxis-assistant-id
Assistant to execute during the conversation
x_praxis_assistant_id
x-praxis-institution-public-id
Override the target Digital Twin when using the voice agent for multiple Twins
x_praxis_institution_public_id
The x_access_token dynamic variable corresponds to the user’s access token from Praxis and is passed through to allow the Chat Completions API to seamlessly connect to your Digital Twin assuming the user’s identity.
This is the example JSON configuration for your Agent’s custom LLM:
Don’t forget to publish your changes after making updates.
Once the ElevenLabs agent is configured in your Digital Twin, you can select ElevenLabs as the voice provider for Pria’s built-in Convo Mode (speech-to-speech).
1
Open Personalization
In the Admin dashboard, select your Digital Twin instance and navigate to the Personalization tab.
2
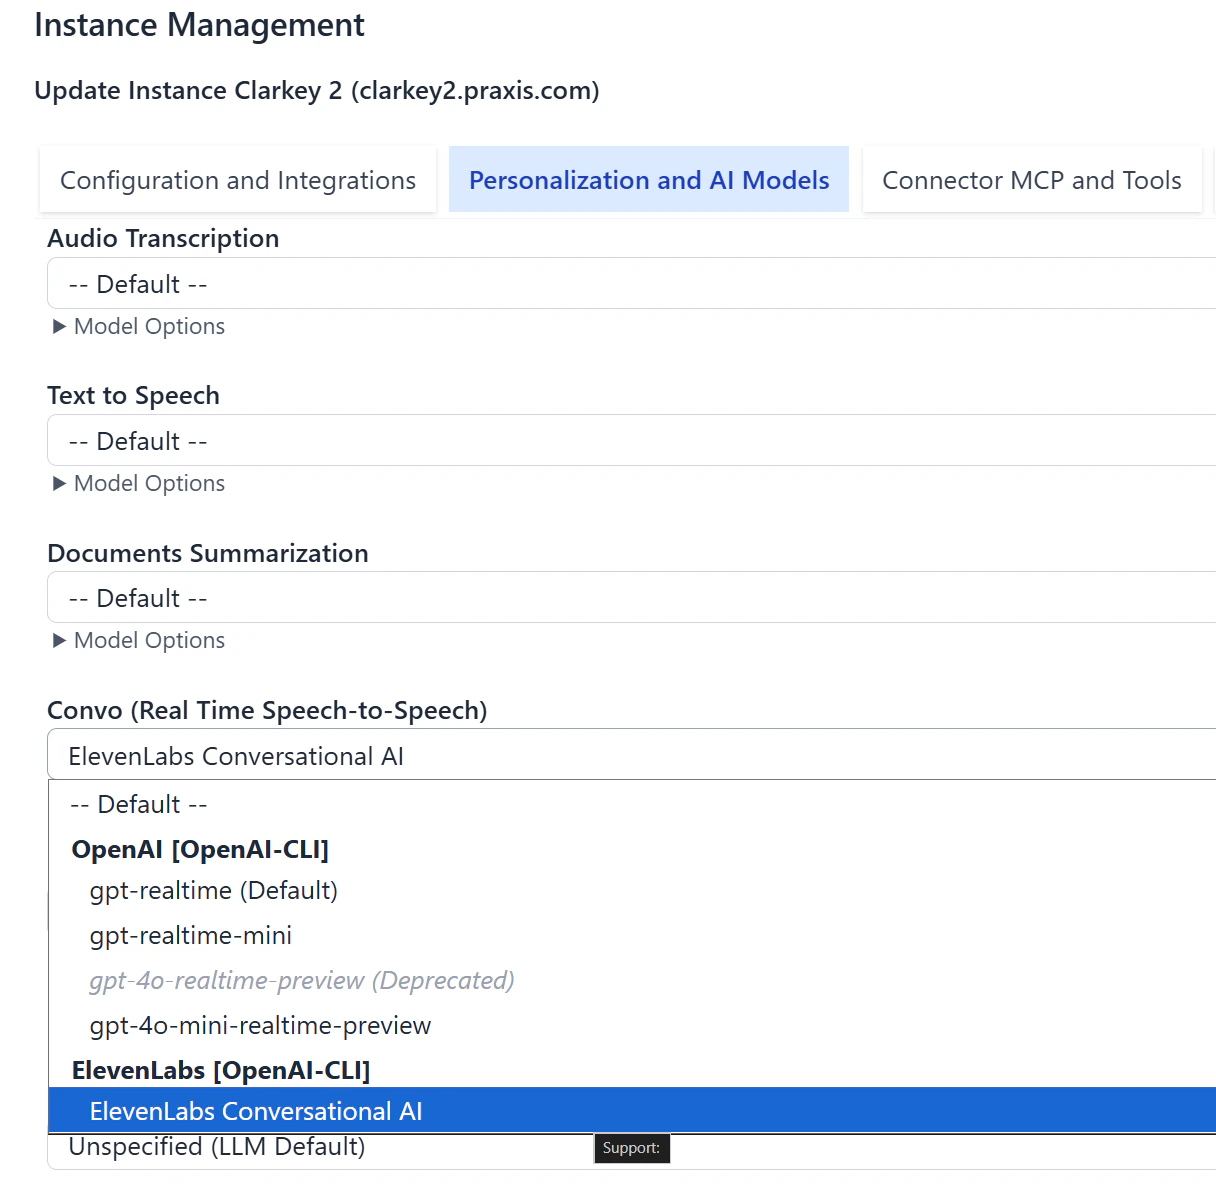
Change the Convo Mode model
Under Convo Mode, select ElevenLabs from the list of supported voice providers.
If ElevenLabs is selected as the voice provider but the Agent ID or API Key are not configured in the Configuration tab, a warning pill will appear directing you to complete the ElevenLabs setup in Configuration.
3
Start a conversation
The Convo widget will now use your ElevenLabs agent for real-time speech-to-speech. Users can click the Convo button to speak directly with the Digital Twin.
Voice selection is not available in ElevenLabs Convo Mode. The voice used is the one configured in your agent’s settings on the ElevenLabs dashboard. To change the voice, update it in your ElevenLabs agent configuration.
ElevenLabs supports two connection methods for the audio stream between the browser and ElevenLabs servers:
Method
Description
WebRTC (default)
Low-latency peer-to-peer connection. Best for most environments.
WebSocket
Server-relayed connection. Use when WebRTC is blocked by firewalls or restrictive network policies.
The connection method can be configured in the Convo Mode settings. If users report connection issues in corporate or campus networks, switching to WebSocket typically resolves the problem.