Choose Your Path
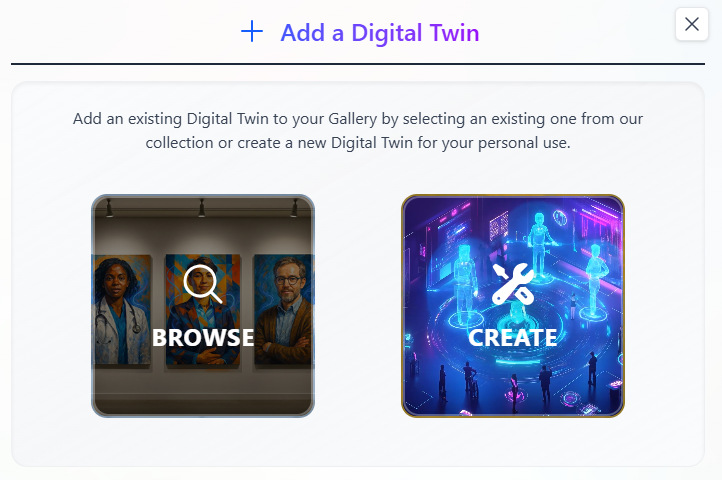
We Build It For You
Our team handles everything. Best for organizations or anyone who wants a polished twin without the setup work.Timeline: 24-48 hours
Build It Yourself
Walk through the 8-step wizard at your own pace. Your twin is live the moment you finish the Configuration step.Timeline: 10-20 minutes
Option 1: We Build It For You
Best for organizations, busy professionals, or anyone who wants an expert-configured Digital Twin on day one.Complete the Request Form
Fill out our intake form (takes about 2 minutes).We’ll ask about:
Request Your Digital Twin
Start the request form →
- Your expertise and domain
- Intended use cases
- Branding preferences
- Any special requirements
We Build Your Digital Twin
Our team configures everything for you within 24-48 hours:
- Personalized AI instructions based on your input
- Visual identity and branding
- Initial knowledge base setup
- Tool and integration configuration
Start Using It
You’ll receive an email with your login link and a pointer to the Quick-start Guide.
This option is ideal for enterprise deployments, faculty with limited time, or anyone who wants an expert-configured twin from day one.
Option 2: Build It Yourself
The self-service wizard walks you through eight steps. You can always go back to a previous step using the stepper at the top or the Back button. The Cancel button (or × on the modal) closes the wizard. Up through Step 6 nothing has been saved, so cancelling discards the in-progress draft. Once you click Create on Step 6 the twin is created — cancelling on Step 7 (file upload) or Step 8 (success) just closes the wizard; the twin stays.Before You Start
A name for your Digital Twin (you can change it later)
An avatar image — file upload, webcam snapshot, or paste from clipboard (optional but recommended)
About 10-15 minutes for the personalization interview; longer if you also upload knowledge files
How to Open the Wizard
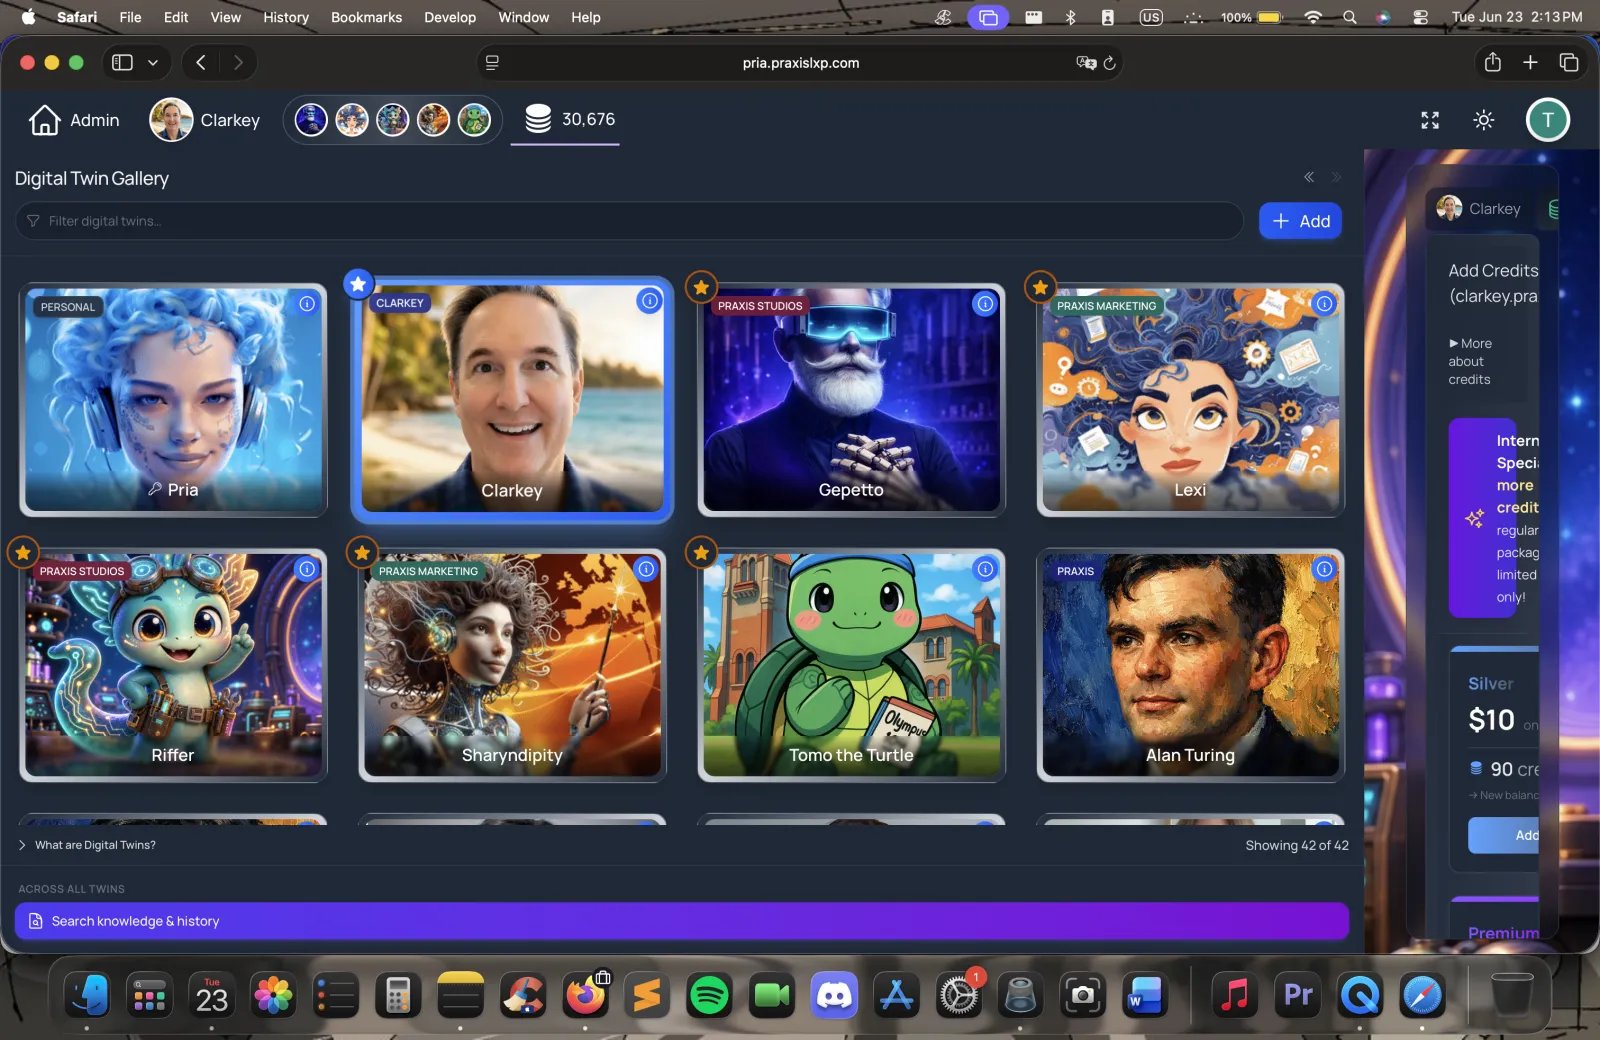
- From the Gallery
- Direct URL
- From Canvas LMS
- Admin Path
The 8-Step Wizard
A stepper across the top of the wizard tracks your progress. You can click any previously-visited step to jump back to it.Name & Type
Enter the Name your twin will be called. It defaults to “Pria” if you leave it blank, and you can change it later. The name you type here also pre-fills the “What should your digital twin be called?” question in the personalization interview.
Profile Picture
Upload an avatar via the picture-upload widget. You can:
- Upload a file from your device
- Take a snapshot with your webcam
- Paste an image from the clipboard
Appearance
Set how this twin looks. Two parts:
- UI Theme — choose User Directed (let each person use their own light/dark preference), Dark, or Light.
- Background images — optional light-mode and dark-mode backgrounds that appear behind the chat surface. Click a background tile to upload a local image (cropped to a wide 16:9 frame), or paste an Image URL (publicly reachable HTTPS).
Personalization Questions
This is the Persona Builder — one curated 14-question interview grouped into five sections (Basic Identity, Role and Primary Use Case, Audience, Communication Style, Advice Style and Guardrails). Questions are shown one at a time with prev/next controls and a progress bar.Most questions are plain text, but two use richer controls:
- A personality slider group — seven traits (tone, energy, detail, feedback, humor, thinking, warmth), each a 1-to-7 scale; click one square per trait.
- A single-choice tile question for how your twin gives advice (Direct, Encouraging, Analytical, or Balanced).
Review Instructions
When you reach this step, Pria automatically generates the twin’s instructions from your interview answers (the Generate Prompt step) and shows them in an editable editor. You can:
- Edit directly to fine-tune phrasing
- Click Regenerate from answers to discard your edits and rebuild from the questions
Configuration
Three groups of settings.Conversation Access — who is allowed to chat with this twin:
Convo Mode — toggle to enable real-time voice conversations with this twin. Off by default.Credit Management — pick one:
Click the Create button (its label includes your twin’s name) when you’re done. The wizard plays a short full-screen creation animation (~5 seconds — Seeding Digital Twin… Infusing personality… Shaping voice & tone… Awakening consciousness…) while it creates the twin, saves your question answers, and refreshes your profile.
| Option | Meaning |
|---|---|
| By Invitation only | Default. Only people you explicitly invite. |
| Members of your account | Shown when you belong to a parent account. Anyone in that account can converse. The option label includes the account’s actual name. |
| Anyone (public) | Public access. Selecting this automatically switches Credit Management to Personal Credits and shows a warning recommending that — you can switch back to Pool Credits if you really want, but it exposes the pool to credit farming. |
| Option | Meaning |
|---|---|
| Pool Credits | Conversations draw from the institution’s shared credit pool. Recommended for most setups. |
| Personal Credits | Each user pays from their own credit balance. You set a one-time Credits awarded per user stipend (default 50) so new users can try the twin before topping up. |
Build Knowledge Base
Optional but powerful. Upload documents to give your twin domain-specific knowledge that is referenced in real time during conversations.You can:
- Drag and drop files onto the drop zone
- Paste files from the clipboard (e.g. a screenshot you just took)
- Click Choose Files to Upload to pick from your device
Done
Success screen with your twin’s avatar, a confirmation that it’s been added to your Gallery, and credit-related guidance:
- If your parent account has auto-transfer enabled, you’re told credits will refill automatically when low.
- Otherwise, an Add Credits Now shortcut takes you to the Pricing page.
- Edit — opens the full admin edit page for this twin (instructions, AI models, files, members, etc.)
- Converse — jumps straight into your first conversation with the new twin
What Gets Saved
When you click Create on Step 6, the wizard sends a single create-institution request that captures everything from Steps 1-6 in one shot:- Name, picture, UI theme, light/dark backgrounds
- Generated/edited instructions
- Conversation access mode and credit policy
- Voice (Convo Mode) toggle
institutionQuestion records linked to the new twin so you can revisit and edit them later from the admin page.
File uploads on Step 7 are independent — each file is processed asynchronously, and you can close the wizard before processing finishes without losing them.
After Creation Checklist
Once your twin is live, work through these:Test Conversations
Open the twin and have a few conversations. Listen for tone, accuracy, and anything that doesn’t sound like you.
Upload Knowledge
Add reference documents to the IP Vault so the twin can ground its answers in your sources.
Configure Assistants
Set up specialized assistants for the specific tasks you’ll use the twin for.
Invite Users
Share access with your team, students, or audience — by invitation, account membership, or public link depending on the access mode you chose.
Troubleshooting
The Next button on Questions stays disabled
The Next button on Questions stays disabled
My background image URL won't load
My background image URL won't load
The URL must be publicly accessible (no login wall), served over HTTPS, free of CORS restrictions, and link directly to the image file (ending in
.jpg, .png, .gif, or .webp). If in doubt, use the Upload File button instead — uploaded images are served from our CDN.The generated instructions don't sound like me
The generated instructions don't sound like me
On Step 5, edit the textarea directly to rewrite phrasing, or click Regenerate from answers to rebuild from the questions. You can always refine the instructions later from the twin’s Edit page.
Creation failed with a rate-limit error
Creation failed with a rate-limit error
Pria limits Digital Twin creation to one per minute per user to keep the system stable. Wait a moment and try again.
I cancelled mid-wizard — did anything save?
I cancelled mid-wizard — did anything save?
Nothing is saved until you click Create on Step 6. Steps 1-5 live entirely in the wizard’s local state — closing or cancelling discards them.
I can't find my new Digital Twin
I can't find my new Digital Twin
Check your Gallery (profile icon in the top nav). Newly created twins appear there immediately. If a twin was created through Canvas LMS, it may be linked only to that course context.
Next Steps
Quick-Start Guide
Learn how to use your new Digital Twin
Add Assistants
Create specialized AI assistants
Integrate Everywhere
Embed your Digital Twin in websites, LMS, and more