Your IP Vault provides enterprise-grade security. Your proprietary information stays isolated to your Digital Twin instance — even other Twins in the same account can’t see it unless you explicitly share it.
What You’ll See in Your IP Vault
Open the vault by clicking the Files button on the input bar. What appears next depends on your role:
Your Digital Twin automatically references files from every vault you can see when answering. Standard users get one personal sandbox plus whatever common knowledge admins have published to their instance; admins get the additional power to publish to the wider audience.
If you only ever see one tab (My Files), you have a standard-user role. That’s by design — instance- and account-wide sharing is reserved for admins to keep the shared knowledge base curated.
Find a file by its content
The vault grid filters by name and status. To find a file by what it says inside — a phrase, a clause number, a code snippet — use the dedicated File Search. Click the magnifying glass in the vault header (or press Ctrl/⌘ + K with the vault open) to open content search. See File Search for the full guide: scope (single vault vs all vaults), result ranking, snippet preview, and jumping straight to the matching segment in the file preview.Adding Files
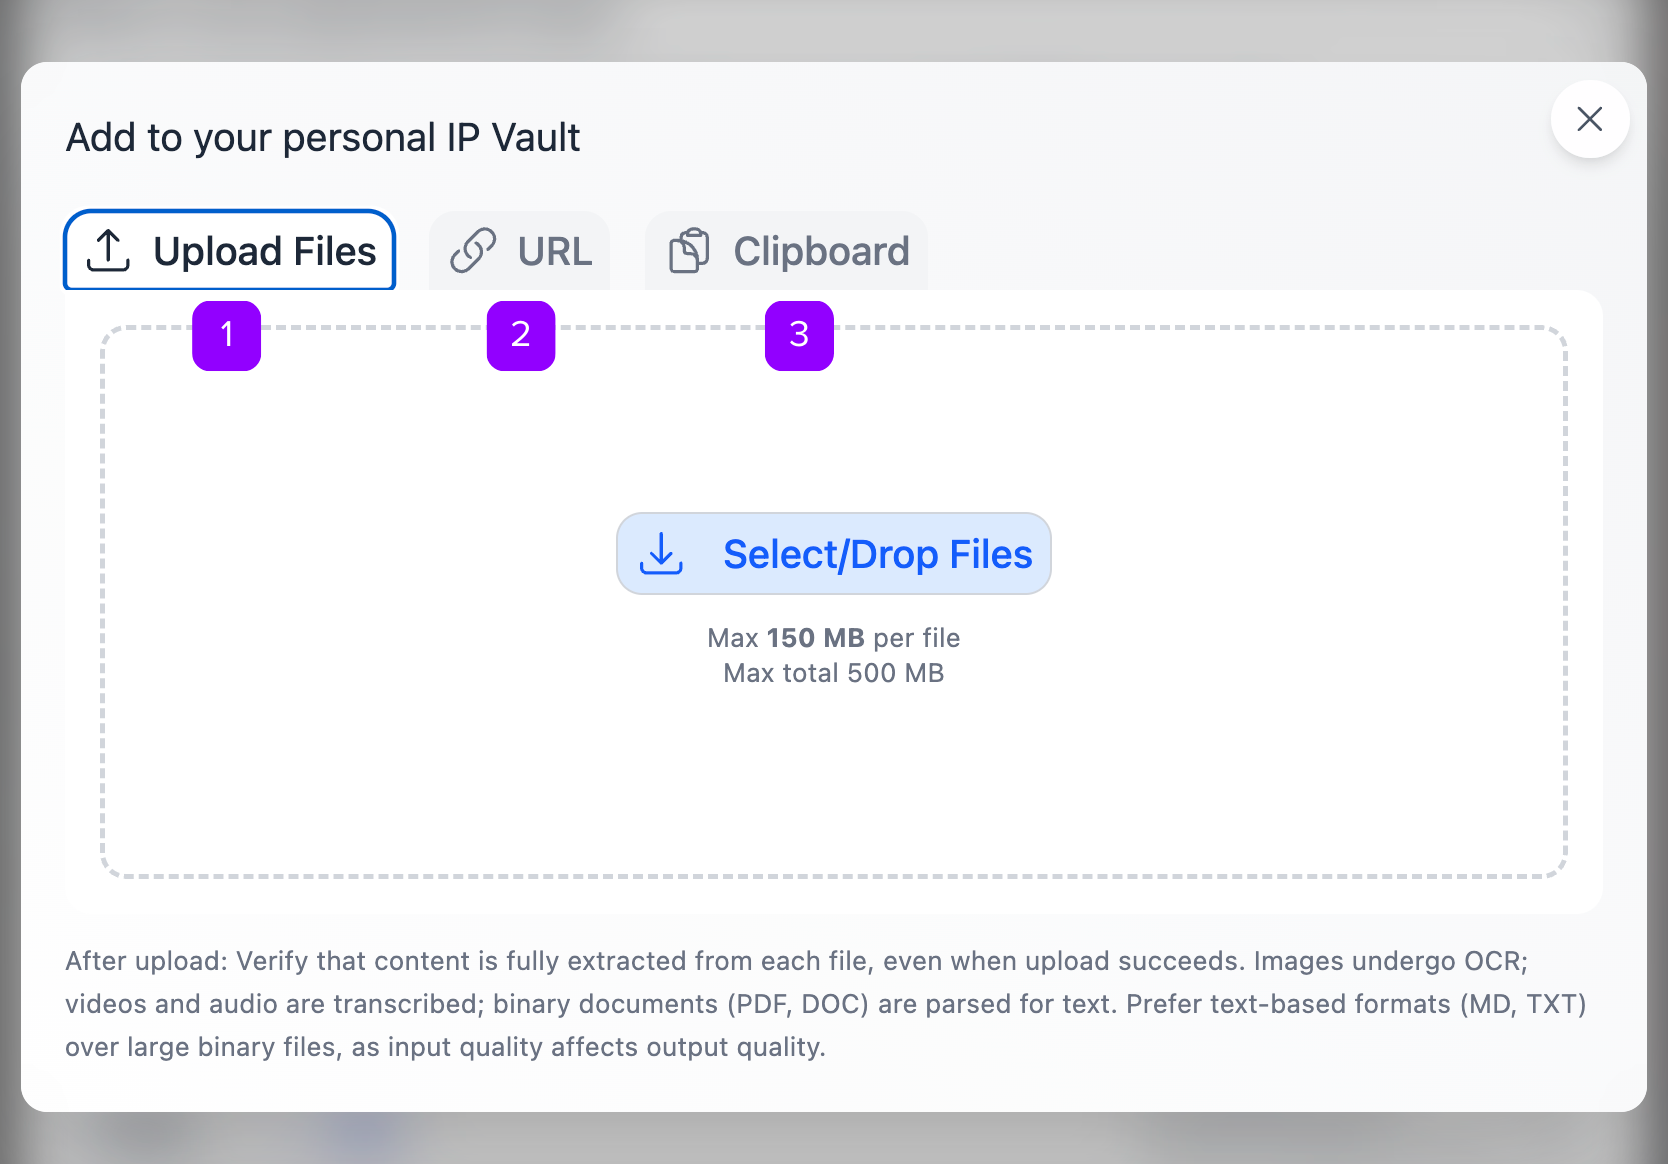
You have three ways to add content to your vault, plus drag-and-drop and bulk paste once you’re in the file panel.The three upload methods

Device Upload
Browse and select files from your computer or phone. Best for documents, presentations, and media you already have locally.
- Click Device in the upload dialogue
- Pick one or more files (multi-select supported)
- Click Upload
URL Import
Paste any web page URL, YouTube link, or Google Docs / Sheets / Slides URL.
- YouTube — Pria auto-extracts the transcript with
[M:SS]timestamps, video title, channel name, and thumbnail. No captions? Check Skip Indexing to store metadata without embeddings. - Google Workspace — If you’ve linked your Google account under Settings > Connected Apps, Pria uses your auth to reach private and shared docs. Without linking, only publicly shared docs work.
- Scrape site — Toggle on to follow links and pull in dependent pages.
Paste from Clipboard
Drop in any text snippet without saving it as a file first.
- Copy any text to your clipboard
- Open the Clipboard tab
- Paste, give it a title, save
Drag and drop
You can drag files from your desktop directly onto the vault panel to upload them. Drop a file onto a collection card to upload straight into that collection. (See Collections below.)Per-file options in the upload dialogue
Before you hit Upload, each staged file carries two toggles (with “for all” master switches when you’re uploading a batch):
The URL tab offers the same Skip Indexing option — handy for YouTube videos without captions, where you want the metadata and link saved but there’s nothing to transcribe.
Step-by-step upload flow
1
Open the vault
Click Files on the text input bar.
2
Click + Add
Bottom of the panel. Or drag files straight onto the panel to skip the dialogue.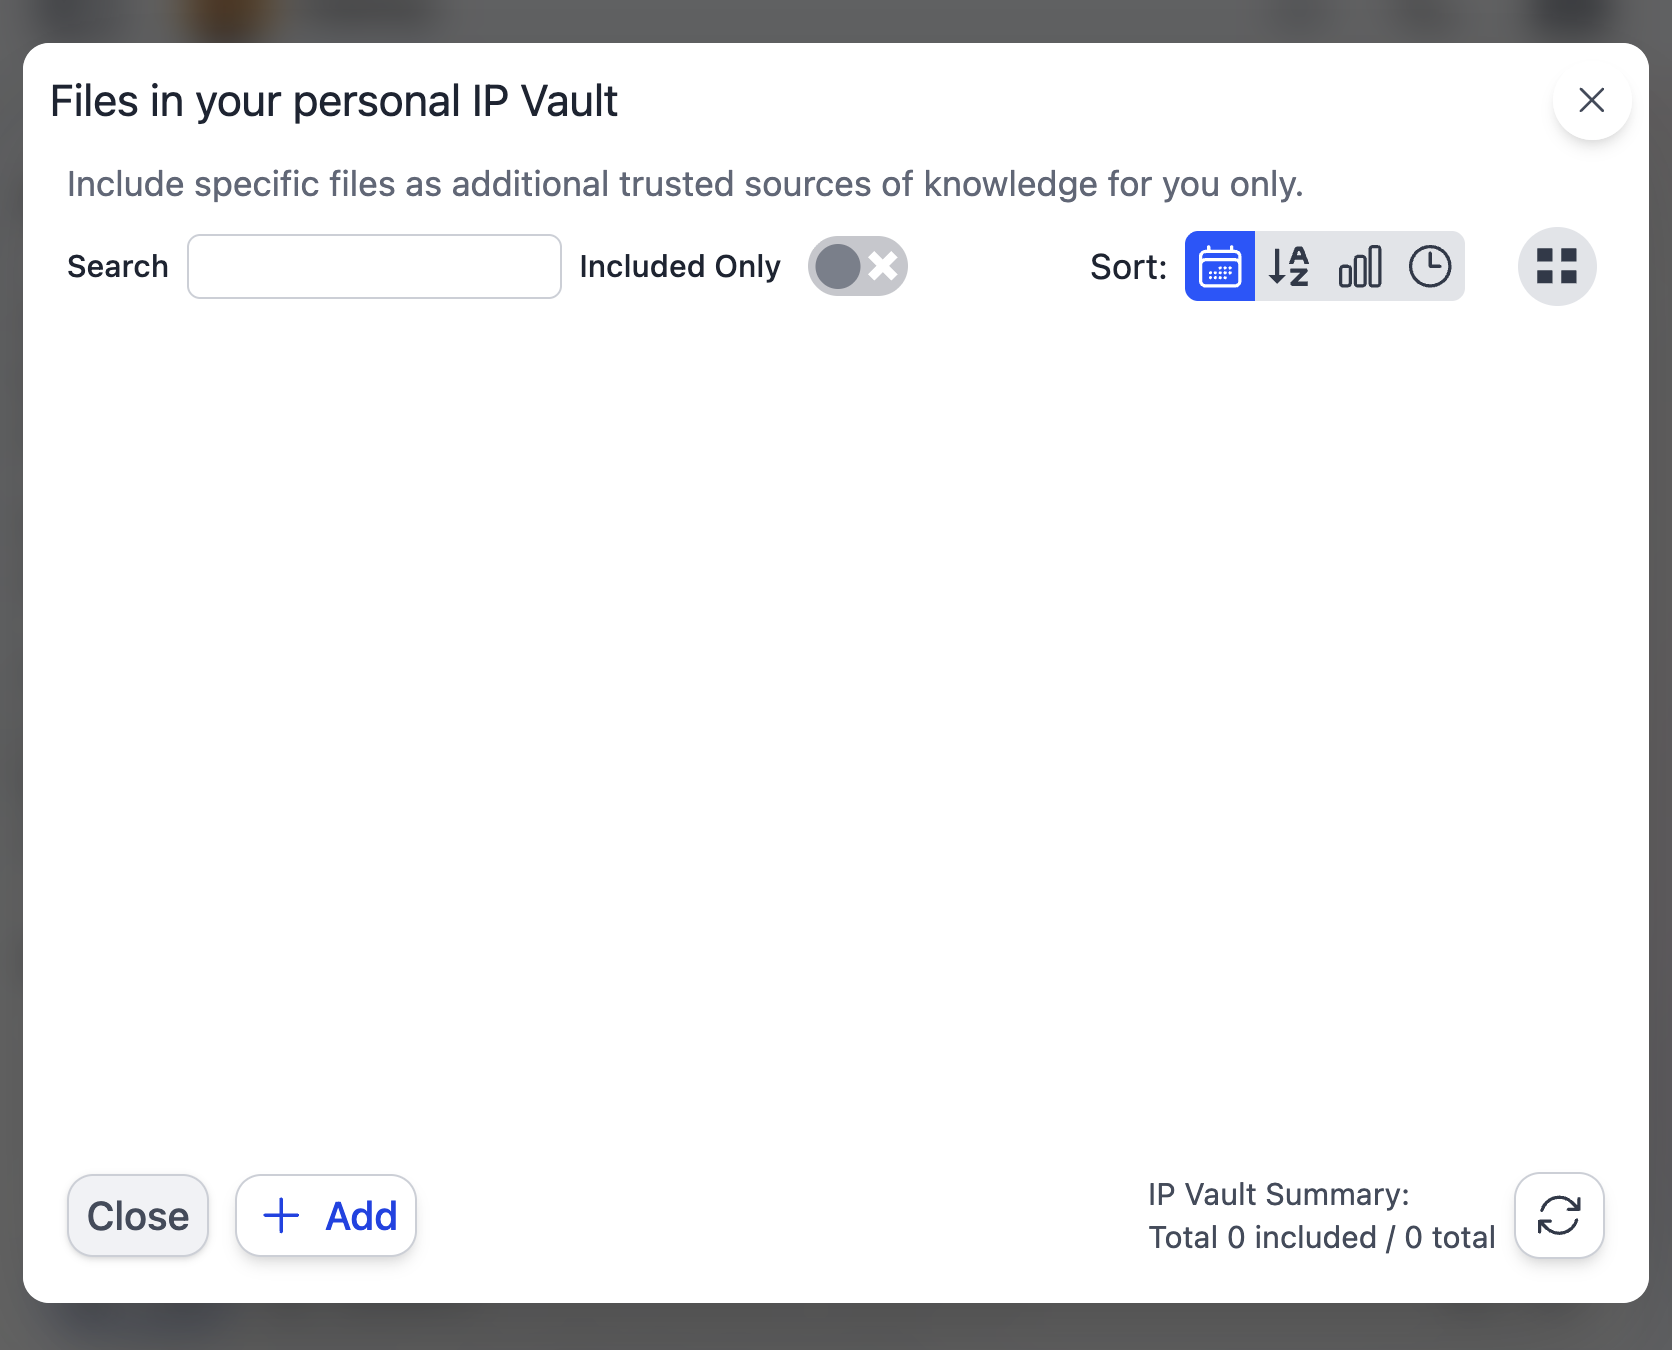
3
Choose your method
4
Upload + monitor progress
A progress bar tracks each file through these stages:
- Uploading — Bytes streaming to the server
- Processing — Extracting text, generating segments, embedding, building the knowledge graph
- Included — Done; available for your Digital Twin to reference
-
Failed — Something went wrong; check the file and try again

The counter updates in batches, not one chunk at a time, so on short files it may pause briefly before jumping. That’s normal — processing is still running.
5
Done — back to the vault
Supported file formats
Large media — automatic chunking at 25 MB
Audio and video files larger than 25 MB are automatically split into smaller chunks before transcription. The transcripts are then stitched back together with continuous timestamps so your Digital Twin treats the file as one continuous transcript. You don’t have to split anything yourself — drop in a 2-hour lecture and Pria handles it.Audio & Video Processing: Speech is transcribed to text and indexed for RAG. Cue-point detection, speaker diarization, and timestamp-linked retrieval are in active development.
Collections — Organizing Your Files
Collections are folders. They live inside a vault, can nest as deeply as you need, and exist purely for your own organization — your Digital Twin still searches all included files regardless of folder.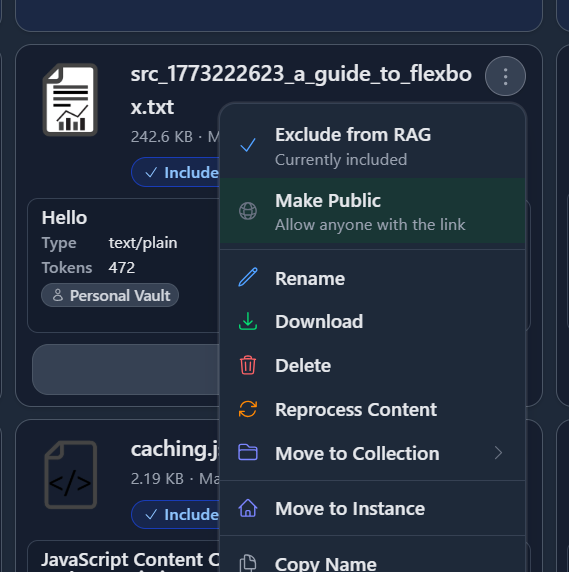
Creating a collection
Click the + New Collection button (or use the keyboard shortcut shown next to it). Give it a name and an optional color. The new collection card appears alongside your files. You can navigate into a collection by clicking its card, and use the breadcrumb at the top to climb back out.Drag and drop — files
- File into collection — Drag a file card onto a collection card to move it in.
- File out of collection — Drag the file from inside a collection up onto the breadcrumb to move it back to the parent (or to vault root).
- File between vaults (admin) — From inside My Files, drag a file onto the Instance Files or Account Files tab header to publish it to the shared vault.
Drag and drop — collections
- Collection into collection — Drop one collection onto another to make it a sub-collection. Nesting depth is unbounded.
- Collection between vaults (admin) — Drop a collection onto another vault’s tab to move the entire folder + all its files at once.
Collection highlighting
Collection cards that contain at least one Included file get a stronger blue border so you can spot active folders at a glance. Empty or excluded-only collections stay neutral.Download a collection as ZIP
Use the collection’s ⋮ menu → Download as ZIP. The archive preserves the sub-collection folder structure.ZIP downloads cap at 1 GB. For very large collections, download sub-collections individually.
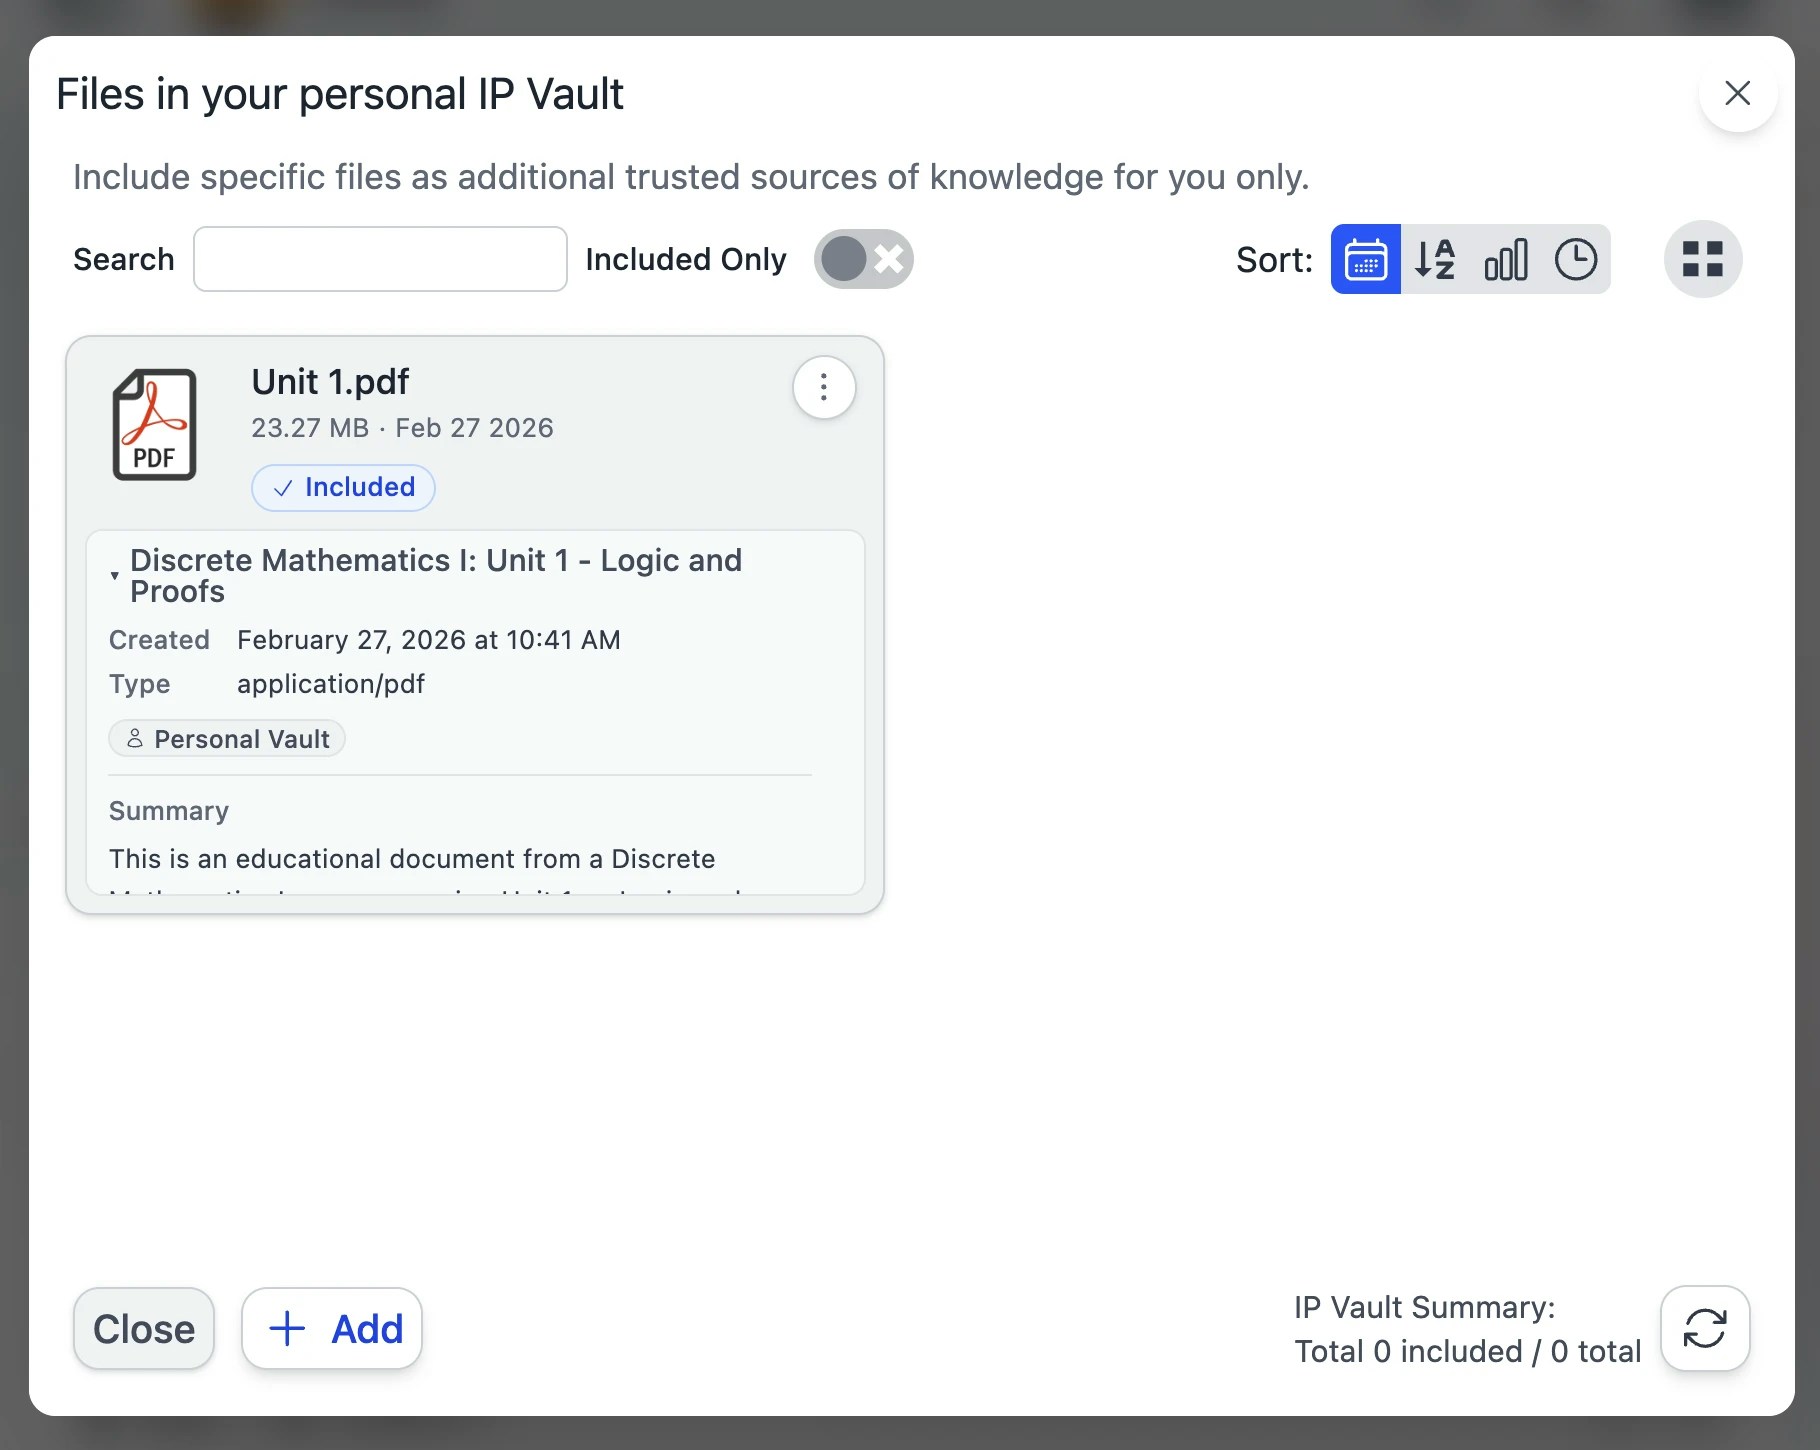
Reading the File Card — at a glance
Every file card surfaces its current state without you having to open it.Status dots
Two small dots in the corner of the card tell you the file’s role in RAG and whether it has a freshness issue:Access badges
- Public — anyone with the URL can view, including unauthenticated visitors.
- Private (default) — signed-in members of the Digital Twin only.
- Confidential — only the owner can open or download it; other members see ”🔒 CONFIDENTIAL” instead of its details.
Processing bar
When a file is mid-ingestion, the card shows a small progress bar with the current phase chip (chunking, sanitizing, embedding, KAG…) and a percent counter. The card auto-refreshes as the worker reports progress.File Action Menu
Click the ⋮ on any file card to open the action menu.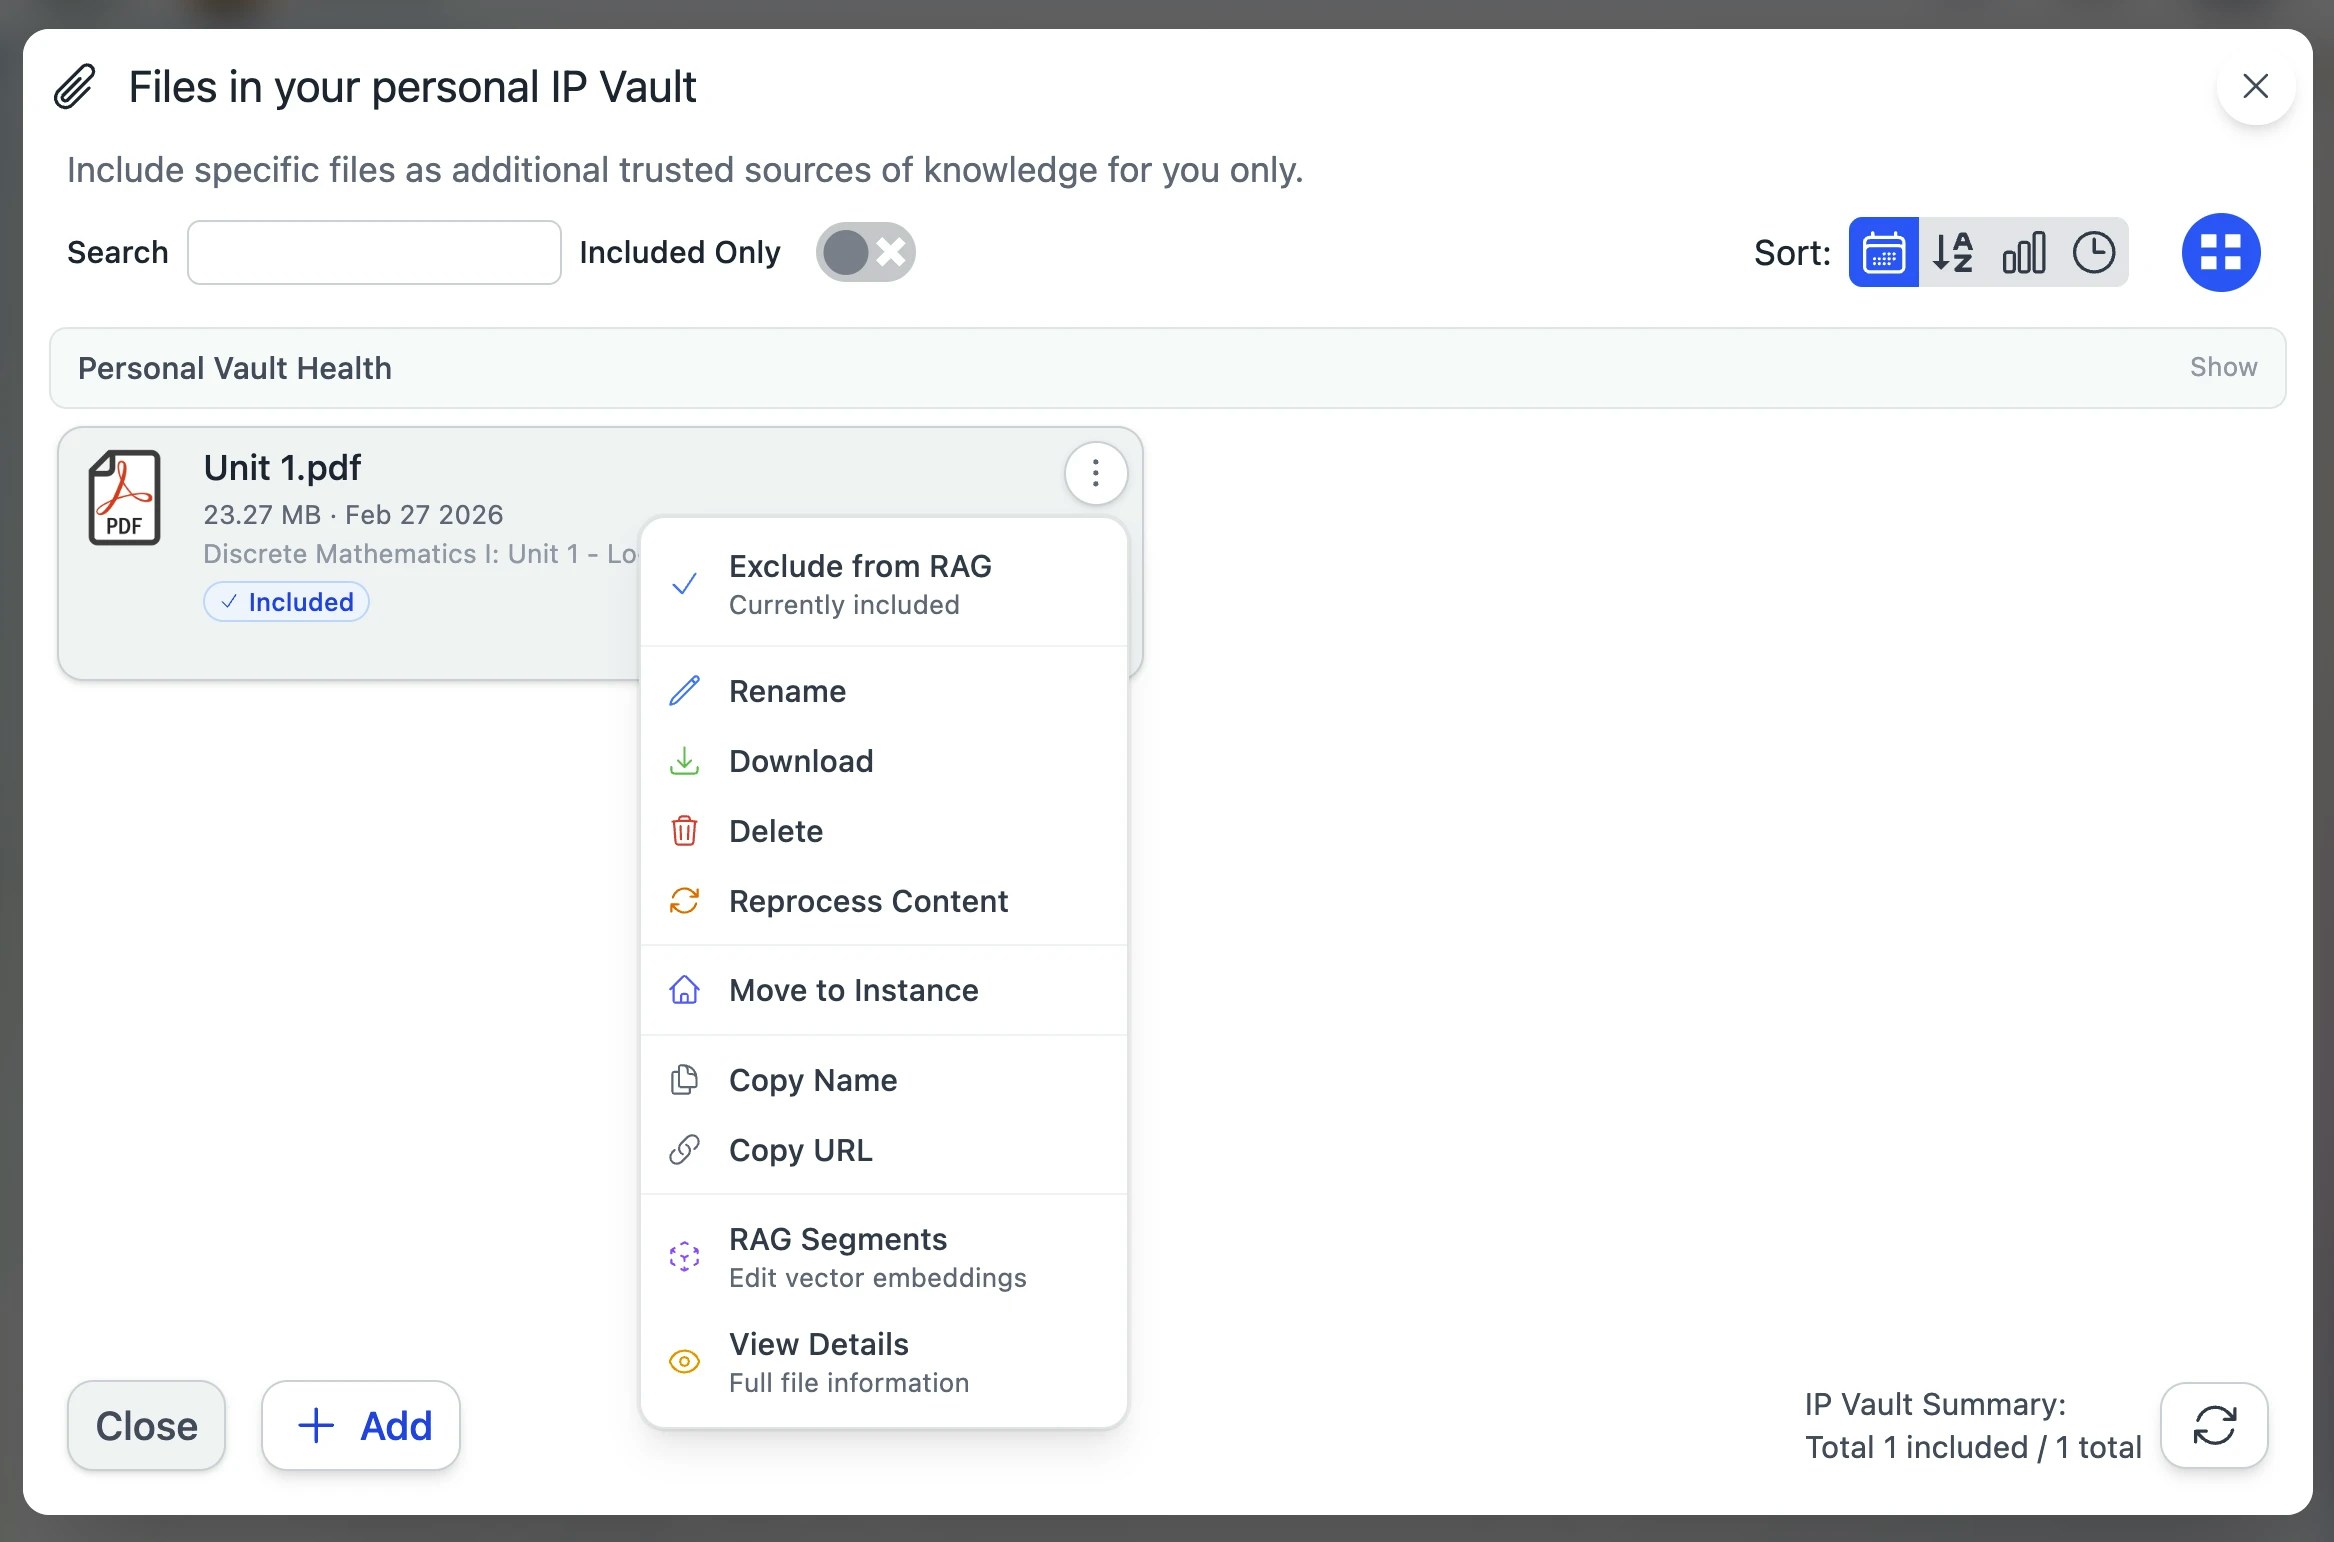
File Preview
Clicking a thumbnail (or Preview in the action menu) opens the File Preview modal — your one-stop look at everything about a file.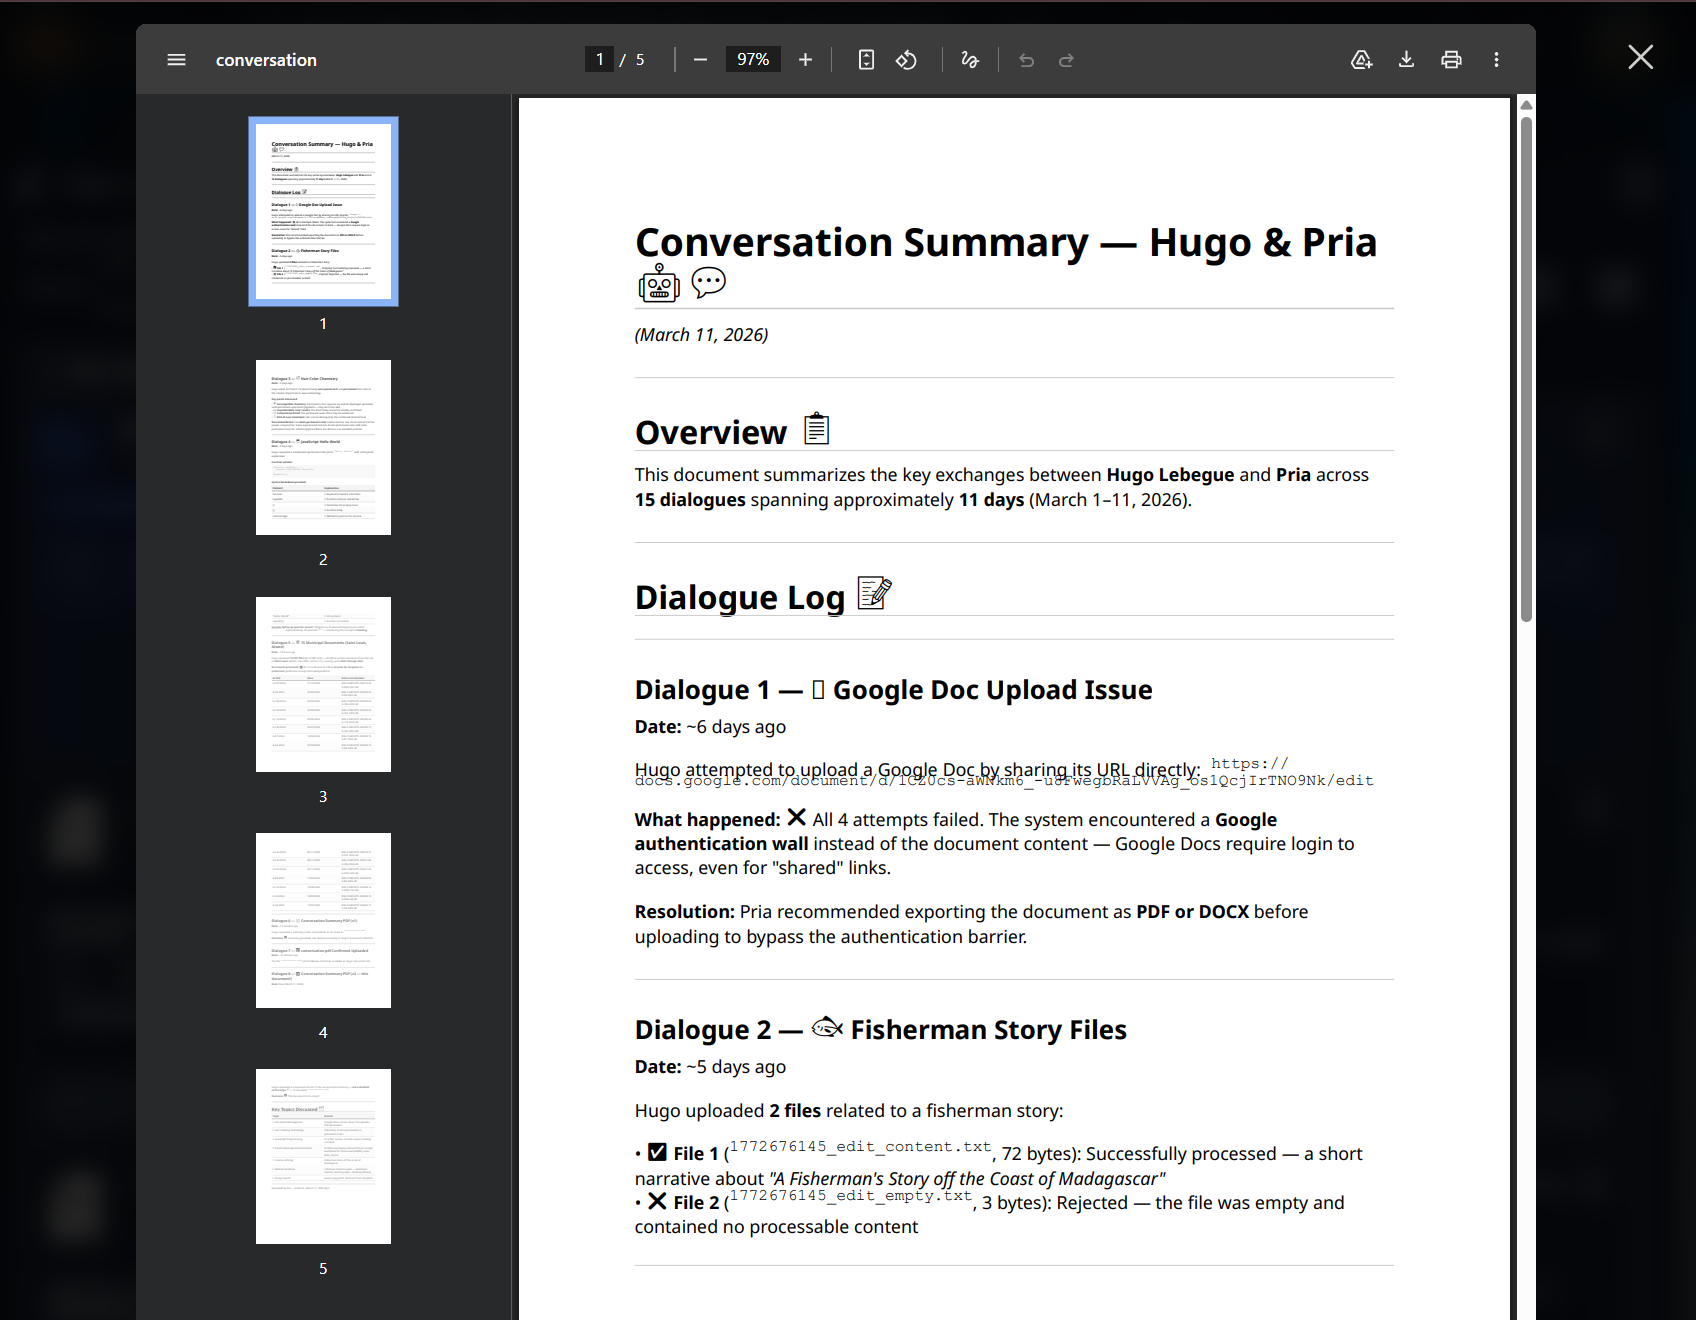
- Body — renders the asset itself: image, PDF, video, audio, text, code with syntax highlighting.
- Right sidebar — the Asset Info panel, organized into collapsible sections.
Asset Info sidebar — sections
The sidebar lists four collapsible sections. They share the available height — open one and it fills the panel; open several and they split equally. Each section’s body scrolls internally, so long Properties text or a large segment list can never push other section headers off-screen.Both Knowledge sections show a “Currently processing” placeholder while the file is mid-ingestion — segments and graph stats only materialize once the pipeline reaches
done.Progress bar consistency: the KAG progress counter is now monotonic across worker slices, so navigating away from a file mid-ingestion and coming back no longer shows the bar jumping low → high → low. Out-of-order chunk completions (common with some LLMs that occasionally return chunks late) advance the display forward as work lands, never backward.
Custom thumbnail
The thumbnail next to the file is clickable in Edit mode. Pick a new picture from your camera, file picker, or by cropping an existing one — the same picker used for profile pictures. The new thumbnail saves immediately and refreshes everywhere the file is displayed.Inline renderers — what shows in the preview body
The preview body renders the asset directly in-browser so you don’t have to download it first:Viewing OCR-extracted text
For image-only PDFs and photos of documents, Pria runs OCR during ingestion. To inspect the extracted text:- Open the file preview.
- Expand the Knowledge — RAG segments section in the right sidebar.
- Each segment shows the text Pria indexed; for OCR’d content, this is the OCR output.
Editing Files in the Preview
Click Edit in the preview’s top-right (or pick Rename / Edit from the file action menu) to flip into edit mode. The body switches to an inline form alongside the segments editor.Editable fields
A single Update button at the top-right of the File Properties section saves all the inline fields in one round-trip. A green ✓ confirmation appears briefly when the save lands.
Inline RAG segments editing
Below the properties, every RAG segment is editable inline. Each segment has:- Update — save your changes to this one segment (text and embeddings are regenerated).
- Sanitize (sparkle icon) — let the AI clean up noise (navigation menus, broken formatting, OCR junk) while preserving the substantive content. Each sanitize is independently undoable.
- Delete — remove the segment from RAG (the source file is untouched).
Unsaved-changes protection
If you try to close the preview or switch back to view mode with unsaved edits, a confirmation dialog asks Keep Editing or Discard & Close — no accidental loss of work.Reprocessing — RAG and KAG
Two distinct pipelines run on every file. You can re-run either independently.Why reprocess?
- You changed the embedding model at the system or institution level and want existing files re-indexed.
- A web source you imported via URL has been updated and you want fresh content.
- The source DB was migrated / restored and your file shows stale segment counts in the preview.
- You added a knowledge graph extractor later and want to backfill the graph for already-ingested files.
Pick the right mode
From Reprocess Content in the file action menu (or the Reprocess button inside the file preview’s segments editor) you get a dialog:
A Skip Indexing checkbox is available on Re-ingest. When enabled, the file content is re-downloaded but embedding generation is skipped — useful when you want to refresh the stored bytes without paying for re-embedding, or when re-ingesting a YouTube video with no captions.
Re-ingest preserves the file’s
_id, filename, and file_url, so any published links keep resolving. Collection membership, Public/Private, and Confidential flags are preserved too.What happens during processing
The file card flips to a progress bar showing the live phase (chunk → sanitize → embed → kag → done). During this window, the preview’s Knowledge sections show “Currently processing” placeholders rather than misleading empty-state copy — segments and graph stats don’t exist yet.
Manually retrying a failed ingestion
A file with a red error dot failed during ingestion (parse error, model timeout, OCR crash, etc.). Open it to see the failure reason in the Processing sidebar section, then choose the right manual trigger:- Transient failure (network blip, model rate limit) — pick Reprocess Content → Full Re-extract.
- Bad source bytes — replace the file (see Re-uploading below) instead of reprocessing.
- KAG-only failure with RAG segments green — pick Re-extract Knowledge Graph (KAG) to keep the existing chunks and just retry the graph step.
error chip clears once the new attempt reaches done.
Deleting Files
Delete a file from the action menu (⋮ → Delete) or in bulk via the selection toolbar.Soft delete + grace period
Deletes are soft — the file disappears from listings immediately, but the underlying bytes and RAG/KAG records are held for a grace period before they’re permanently purged. During the grace window:- The file no longer appears in the vault grid or search.
- Pria will not retrieve it as context for new conversations.
- Existing citations in past conversations still resolve — they show a “This file has been deleted” note in the preview.
- An admin (or you, by contacting the Praxis AI team at humans@praxis-ai.com) can request restoration before the grace period ends.
Re-uploading — replacing an existing file
If you have an updated version of a file already in the vault:- Same-name re-upload — Drop a new copy with the same filename into the same vault / collection. Pria recognises the match and asks whether to Replace (keeps the same
_id, file URL, and citations — re-runs the full pipeline) or Keep both (adds a(2)suffix to the new one). - URL-imported file — Use ⋮ → Reprocess Content → Re-ingest from URL to refetch the latest content from the original source. The file’s
_id, filename, and shareable URL all stay the same. - Major reorganisation — Delete the old one (see grace period above) and upload the new file fresh; expect new citations to look slightly different.
Bulk Operations
Check the boxes on multiple file cards (or Select All) to enable the bulk action toolbar.
Bulk select also works inside a collection — handy for clearing out a folder or moving a batch between vaults.
Display filter — narrowing the file grid
The sidebar’s Display segmented control narrows the file grid to a single state. The active filter is also pinned next to the Files (N) header and the Collections (N) header as a colored chip with an × to clear.Processing and Error are “attention” filters — they surface every file in scope that needs your eye, including files nested inside a collection or sub-collection. The other three modes (All / Included / Excluded) keep the standard drive-style view where collection-bound files only show up when you navigate into their folder.
Vault Health
The vault header shows an A–F letter grade plus a tooltip breakdown. The grade is computed server-side from your file inventory and reflects how usable your Digital Twin’s knowledge base is.What the grade measures
Each category’s penalty is (weight × count) ÷ total files. A vault with no files returns
N/A.
Files with issues — the panel
Below the health pills, the Files with issues panel lists every problematic file in scope. The list and the pill counts share the same scope predicates server-side, so they always agree — if the pills say “5 errors”, the list shows 5. Scope follows your browsing context:- At the vault root, the panel covers the whole vault (incl. files nested in collections).
- Inside a collection, the panel narrows to that collection’s subtree. The heading reads
Files with issues in Collection › Sub-collection:and a “All collections in this vault” checkbox lets you expand the scope back to vault-wide. - With the All Vaults Health toggle on, the panel fans out across Personal / Instance / Account and each row leads with a colored vault pill (blue = Personal, emerald = Instance, purple = Account).
Reading a row
Each row reads:- The vault pill is only present in All Vaults mode — it tells you which vault the file lives in.
- The collection breadcrumb uses the same colored folder icons as the rest of the product (per-collection accent color when set; default outline icon otherwise).
- The issue chip at the right summarizes the problem (
error,needs reprocess,missing,invalid URL,unoptimized,stale,never used,needs delete).
Improving your grade
The grade is recomputed every time you open the vault. Health-only filters in the header let you narrow the grid to just one category for fast cleanup.
Your Access table
For Instance and Account vaults, the Vault Health panel includes a small Your Access table at the bottom showing whether you can List / Add / Edit / Delete files and institutions in that scope — a quick reminder of what entitlements gate your actions there. The table is hidden in the Personal vault (you always have full control over your own files).File Access Control — Public / Private / Confidential
Every file is one of three access levels, settable per-file or in bulk:
Change from the file action menu, or in bulk via the selection toolbar. To switch every file in a collection at once, use the collection’s ⋮ → Make All Public / Private.
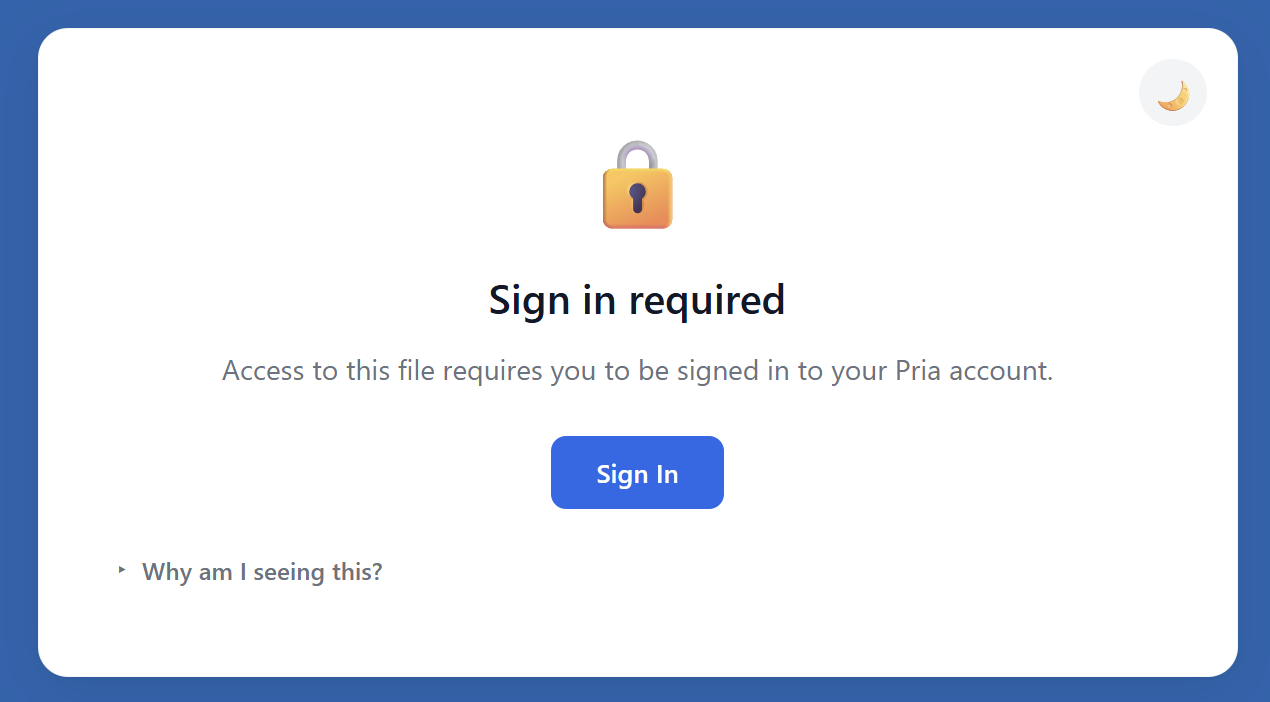
Files accessed without the required permissions show a sign-in / access-denied page:
What Confidential really means
Confidential applies to files in shared vaults (Instance and Account) — personal files are only yours to begin with. Marking a shared file Confidential hides the file itself from other members while still letting its knowledge contribute to the Digital Twin:- Only you can open it. Other members — including admins — can’t preview, download, or read the file. Where its name would appear with a title and summary, they see a ”🔒 CONFIDENTIAL” marker instead, with no download link or file details.
- Its knowledge still helps the team. The file’s content remains indexed and can still inform the Digital Twin’s answers for other members. What’s protected is the document itself: others can’t open it, and the retrieved-passages panel shows them only a short, redacted snippet — never the full text or the file’s details.
- You keep full access. In your own conversations the file behaves normally — full citations, full preview, full retrieval.
- You can change your mind. Confidential is a toggle, not a one-way door: use Make Public in the action menu (or edit the Rights field in the preview) to lift the protection at any time. Toggling works before or after upload.
Import Course Packages (IMSCC)
Pria imports IMS Common Cartridge (.imscc) packages — the standard export format from Canvas, Blackboard, Moodle, and D2L.
What you get:
- Upload a
.imsccfile - Pria extracts:
- Syllabus + course overview pages
- HTML content from lessons, assignments, modules
- Images and embedded media (vision-described)
- Discussion topics + announcements
- Extracted content is organized into a Collection and indexed for retrieval
Image-heavy courses take longer — Pria uses vision models to caption embedded images for retrieval.
Sorting & View Options
Click an active sort button again to flip its direction.
Tree of Knowledge — browse your vault as a graph
The sidebar’s Display selector can switch the whole panel from Files to Tree of Knowledge — a hierarchical view of the knowledge graph Pria has extracted from your documents. Instead of file cards you browse pillars (top-level themes) down into entities (people, organizations, concepts), the relationships between them, and finally the source files each piece of knowledge came from. Clicking a node opens a detail panel describing it.- A vault filter narrows the tree to Personal, Instance, or Account knowledge.
- A Knowledge Layer badge shows how ready the graph is — it fills in as files finish knowledge-graph extraction.
- The tree grows over time: “Your Tree of Knowledge will grow as files are indexed.” New uploads add branches automatically once their graph extraction completes.
Best Practices
Organize with Collections
Use Collections to mirror how you think about the content — by topic, course, project, or release. Sub-collections nest as deeply as you need.
Mind the dots
An orange dot means something to fix; a green dot means the file is pulling its weight. Skim the grid before a big conversation to spot anything that needs attention.
Sanitize noisy sources
Web scrapes, OCR’d PDFs, and email exports often contain navigation and boilerplate. Run Sanitize All in the RAG Segments editor to strip noise — retrieval quality jumps measurably.
Watch the vault grade
Aim for an A or B. The breakdown tells you exactly which files are dragging the score down so you can focus cleanup where it matters.
Use Edit mode to refine metadata
The AI-generated Title and Description are starting points. Tighten them so your Digital Twin retrieves the file when you’d expect — wording in the Title affects RAG ranking.
Reprocess when models change
After a system or institution embedding-model switch, hit Reprocess Content → Re-embed on important files so they’re indexed under the new model.
Your Digital Twin gets sharper with every file you add — but only if those files are findable. The vault health grade, RAG Segments editor, and KAG section are all there to make sure what you upload actually gets used.
Related
- IP Vault — Vault concepts: scope, access tiers, RAG/KAG.
- Collections — Folders, nesting, drag-drop, multi-select.
- File Search — Content search across vaults.
- File Processing — Ingestion pipeline phases and what each step does.
- Citations — How Pria cites files in conversation.
- Audio Notes — Voice-only uploads.
- Knowledge Modes — Retrieval mode selector (RAG, KAG Fusion, Search Only).