“Instance” and “Digital Twin” mean the same thing throughout this guide. Pria uses both interchangeably depending on whether the surface is technical (Instance Settings) or product-facing (your Digital Twin).
Where to find Instance Settings
The Instance Settings lightbox opens from a few places:- The gear icon next to the Digital Twin name in the top bar.
- The Settings → Instance entry in the sidebar.
- The Configure button on a Digital Twin tile from the Digital Twin chooser.
Conversation — model, reasoning, and behaviour
The Conversation panel sets the AI behind this Digital Twin and how it behaves for every member.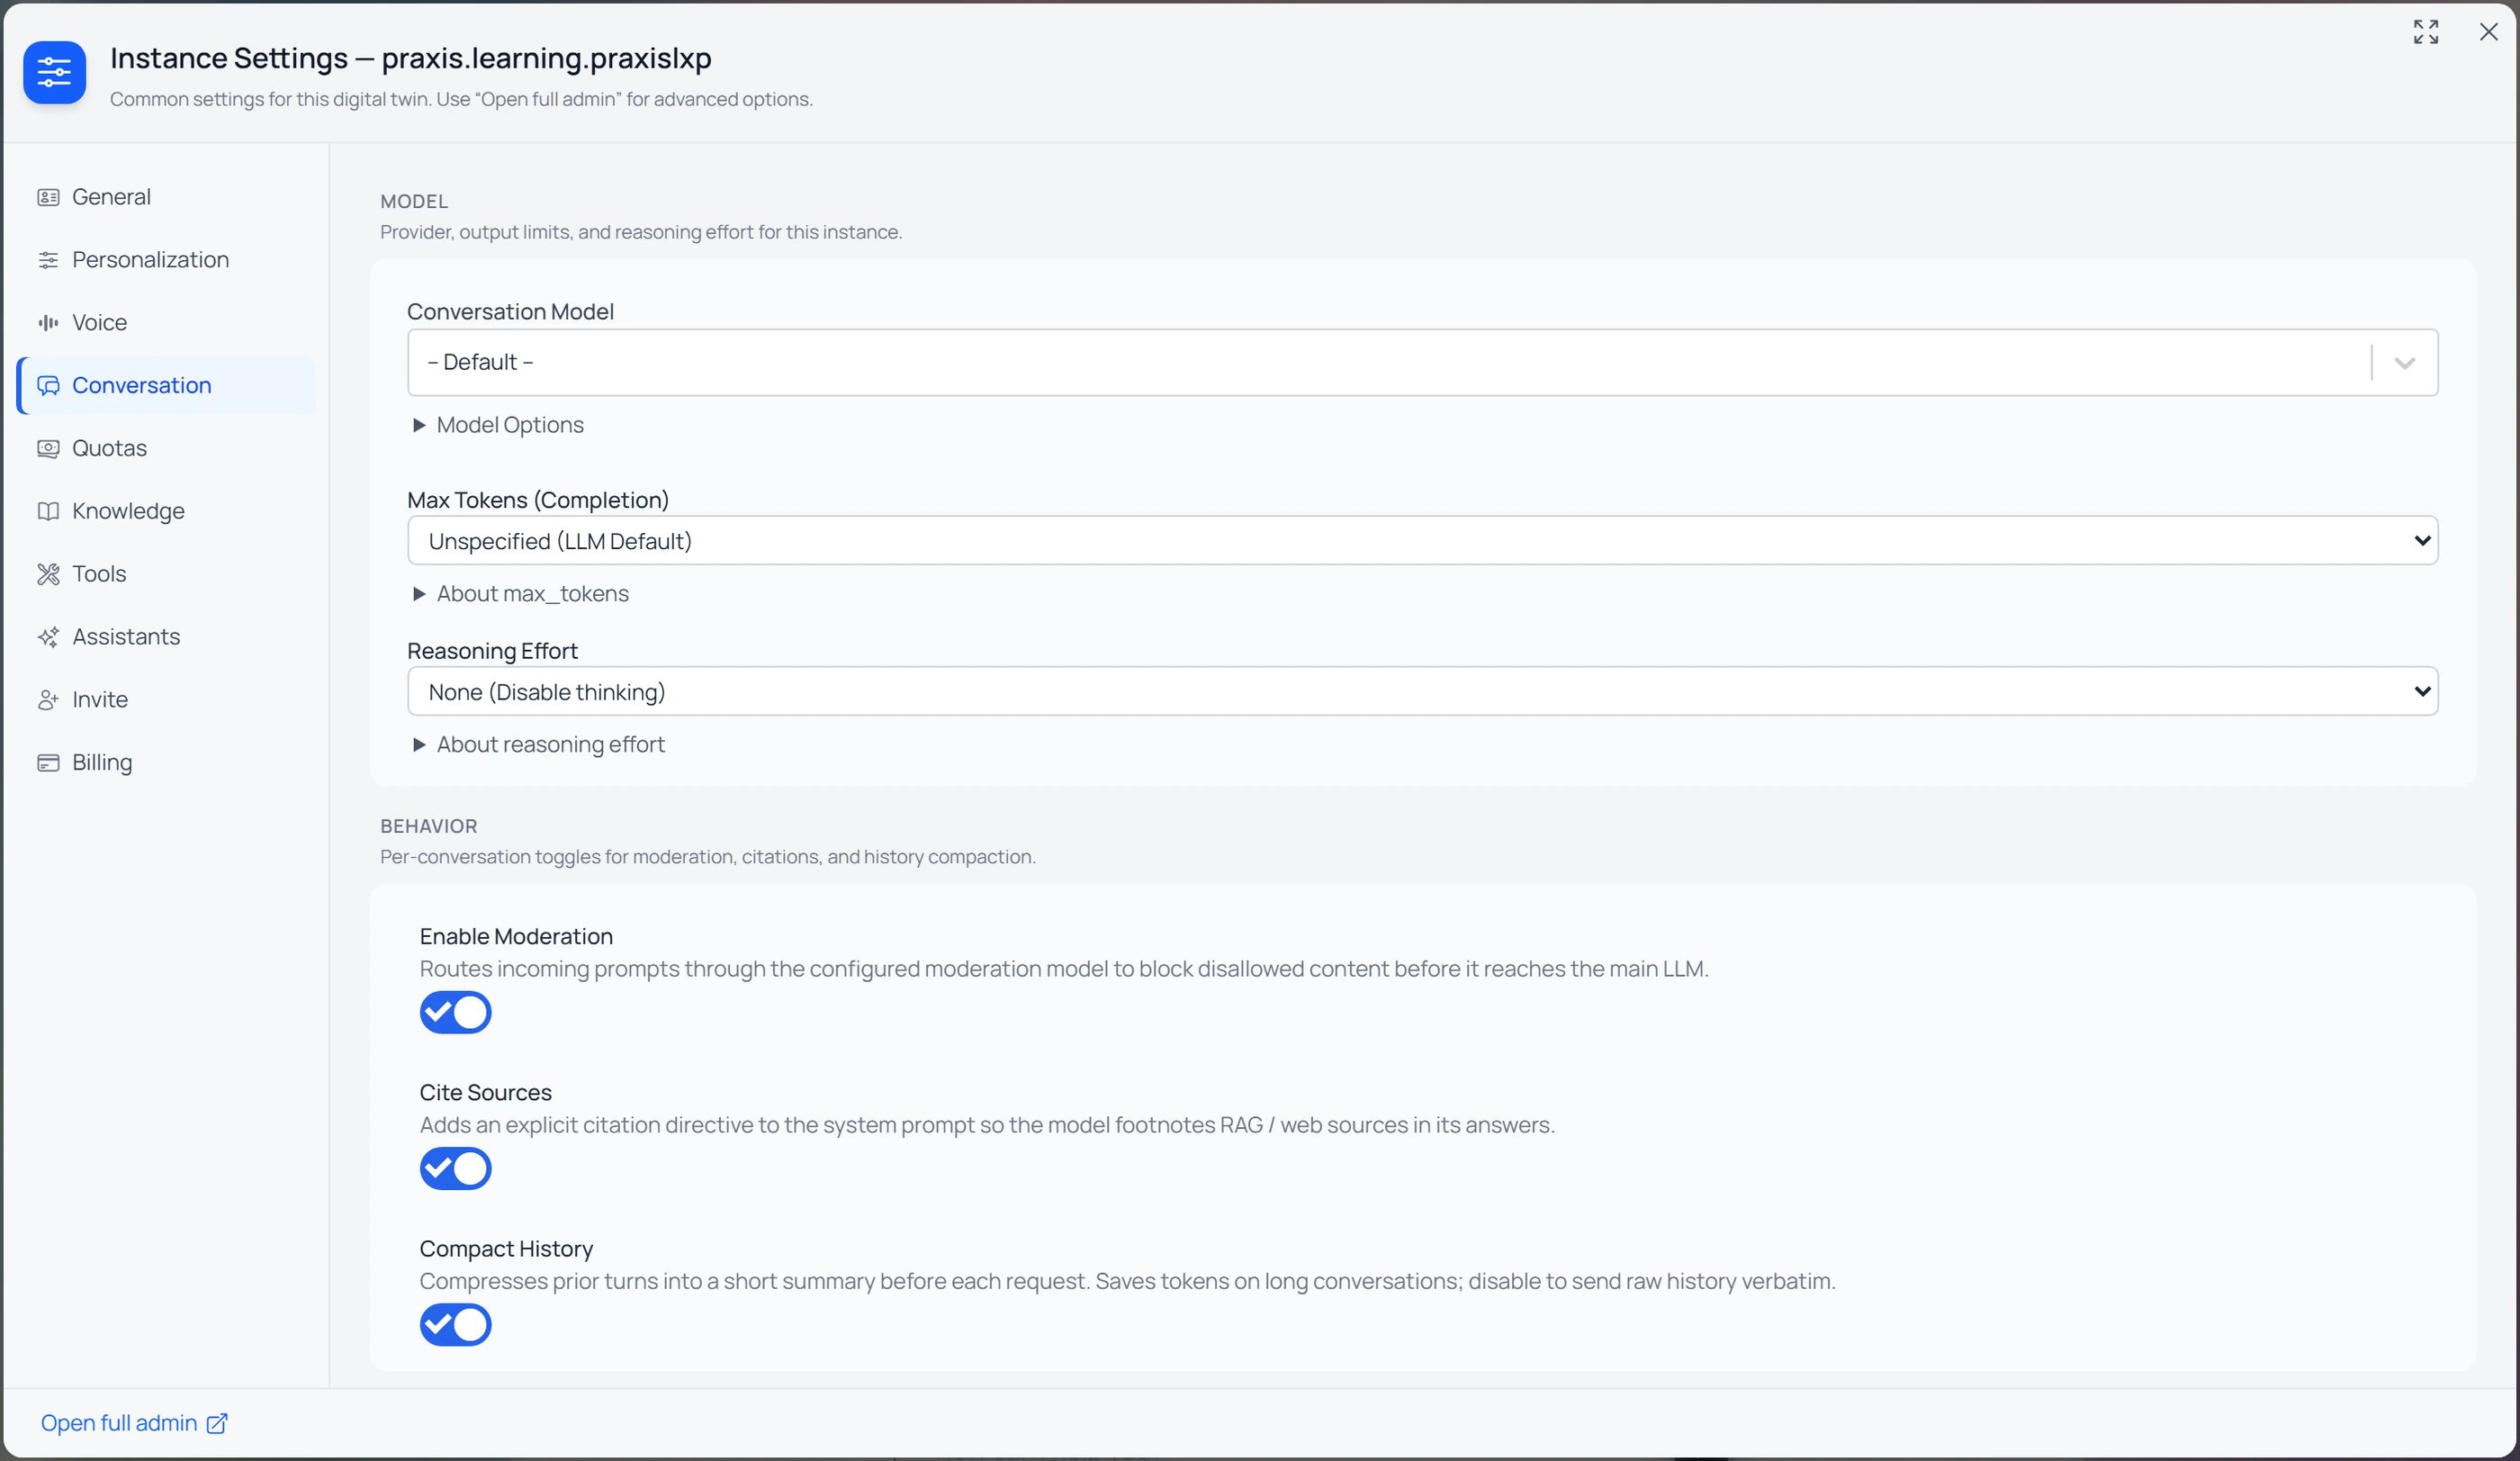
- Conversation Model — the model every conversation uses by default;
-- Default --uses Pria’s platform default. Expand Model Options for the full catalog (input/output sizes, price, and capability icons). See AI Models for Your Twin. - Max Tokens (Completion) — caps the length of each reply; Unspecified uses the model’s own default.
- Reasoning Effort — how much the model thinks before answering (None / Low / Medium / High / Max). See Reasoning & Thinking.
- Behaviour — Enable Moderation (screen prompts before they reach the model), Cite Sources (footnote RAG / web sources in answers), and Compact History (summarise older turns to save tokens).
Theme — Light, Dark, or User Directed
Found under Personalization → Appearance. Choose how the interface looks for every member of this Digital Twin:
User Directed is the most common choice — it respects each member’s preference. Pick Dark or Light when you want a consistent look (for example, a presentation Digital Twin shown on shared screens).
Knowledge retrieval display
Found under Personalization → Display Details. Controls whether the file segments Pria retrieves for each answer appear above the response:- Display RAG/KAG Search Details — when enabled, each answer shows a magnifying-glass block listing the file segments retrieved, with file name, relevance percentage, and a chunk preview. Disable for a cleaner conversation view; confidential file content stays redacted regardless of this setting.
Knowledge — graph & ingestion
The Knowledge panel controls how this Digital Twin’s vault is searched and how files are processed as they arrive.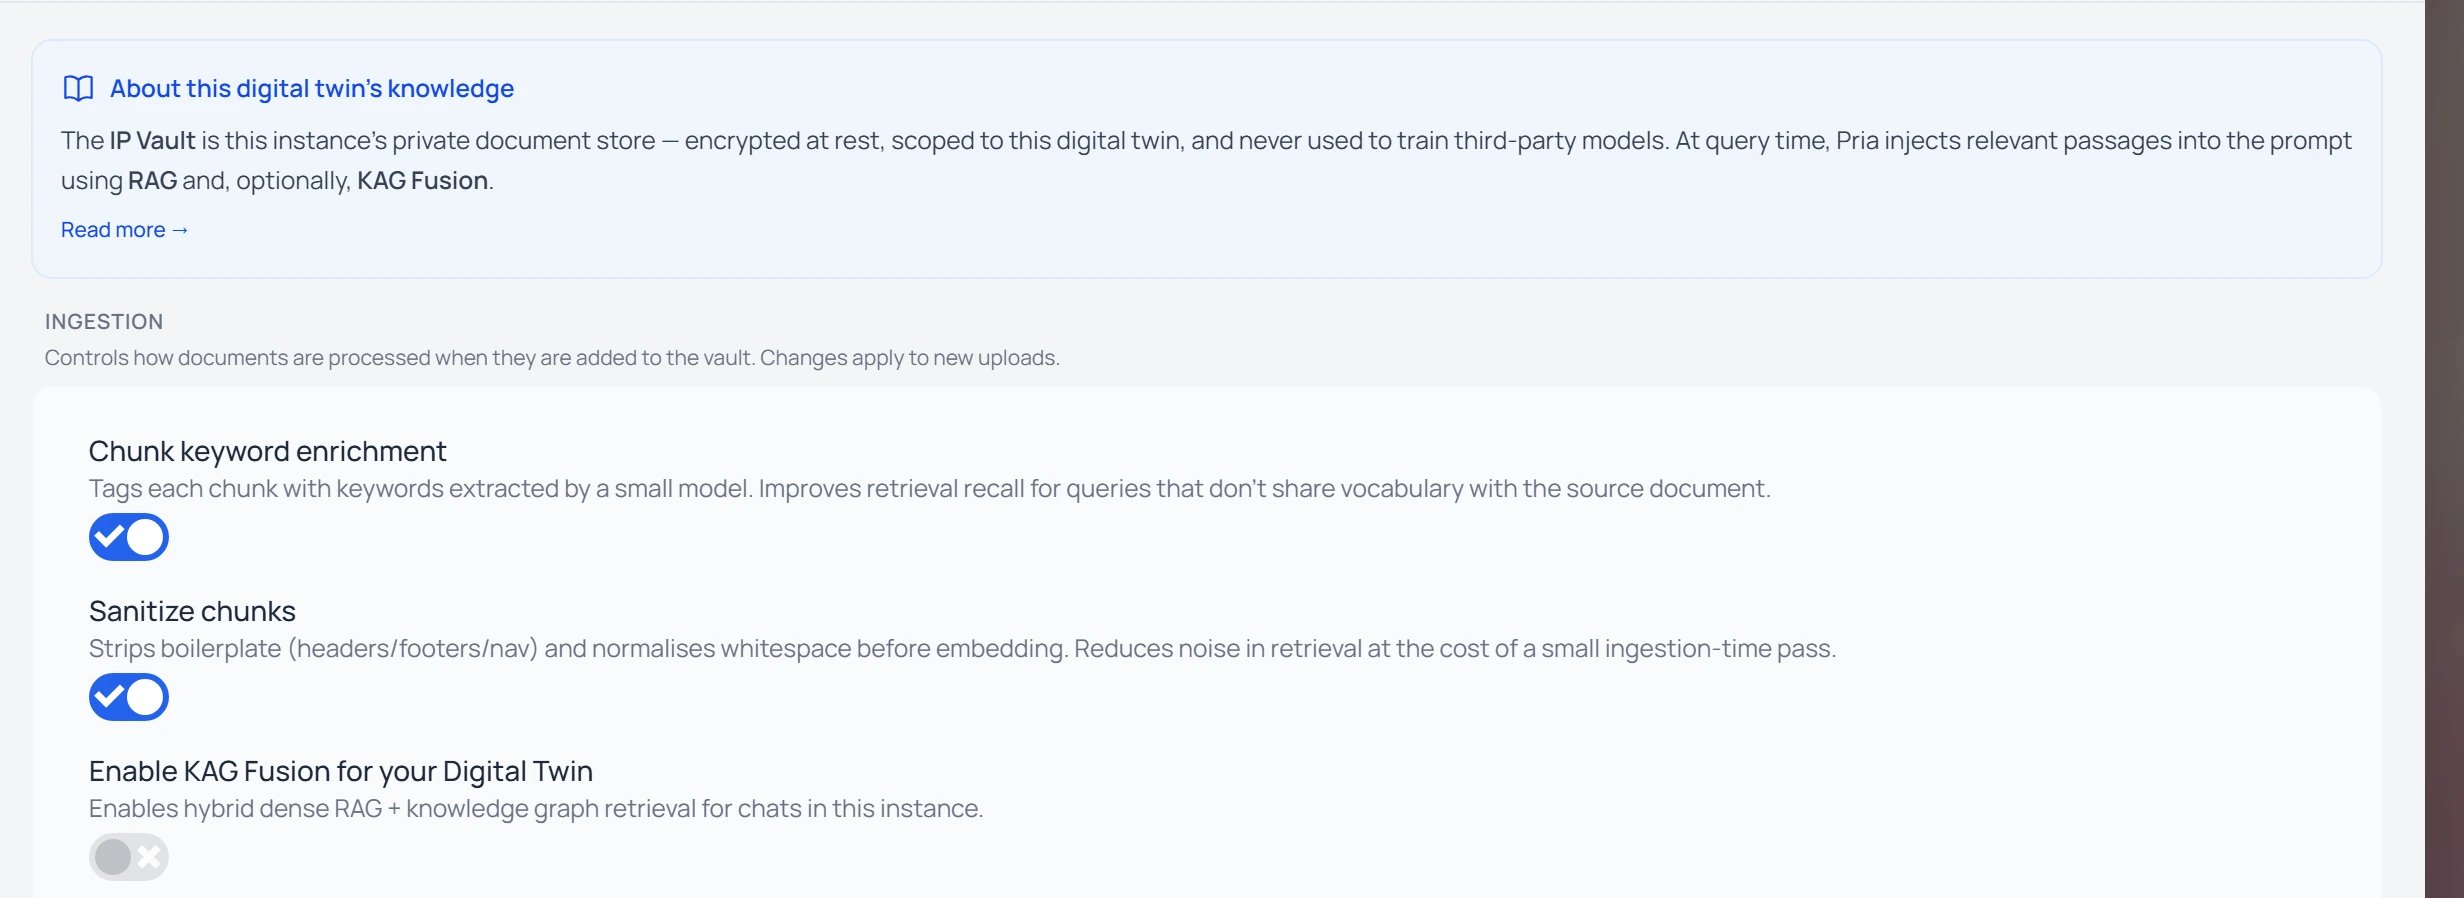
- Enable KAG Fusion — adds a knowledge-graph leg on top of dense RAG retrieval for richer, multi-hop answers (building the graph processes every file with an extra pass, so it costs more credits). See Knowledge Modes.
- Ingestion — Chunk keyword enrichment (tags chunks with extracted keywords to improve recall) and Sanitize chunks (strips boilerplate before embedding) tune how new uploads are indexed.
Thinking and reasoning display
Pria can show the model’s reasoning trace above each answer (where the underlying model exposes one). There are two independent toggles under Personalization → Display Details:- Display Thinking Details — surfaces the reasoning trace on saved conversation history. Disable to hide it and stop persisting it on new answers.
- Display Thinking Execution — surfaces the reasoning trace live, as the response streams. Disable to keep the live conversation surface minimal. This does not affect what was already persisted on previous answers.
Reasoning traces only appear for models that expose them — Claude 3.7+, Sonnet 4+, Opus 4+, OpenAI o-series and GPT-5+, Gemini 2.5+. Other models will show nothing even with both toggles on.
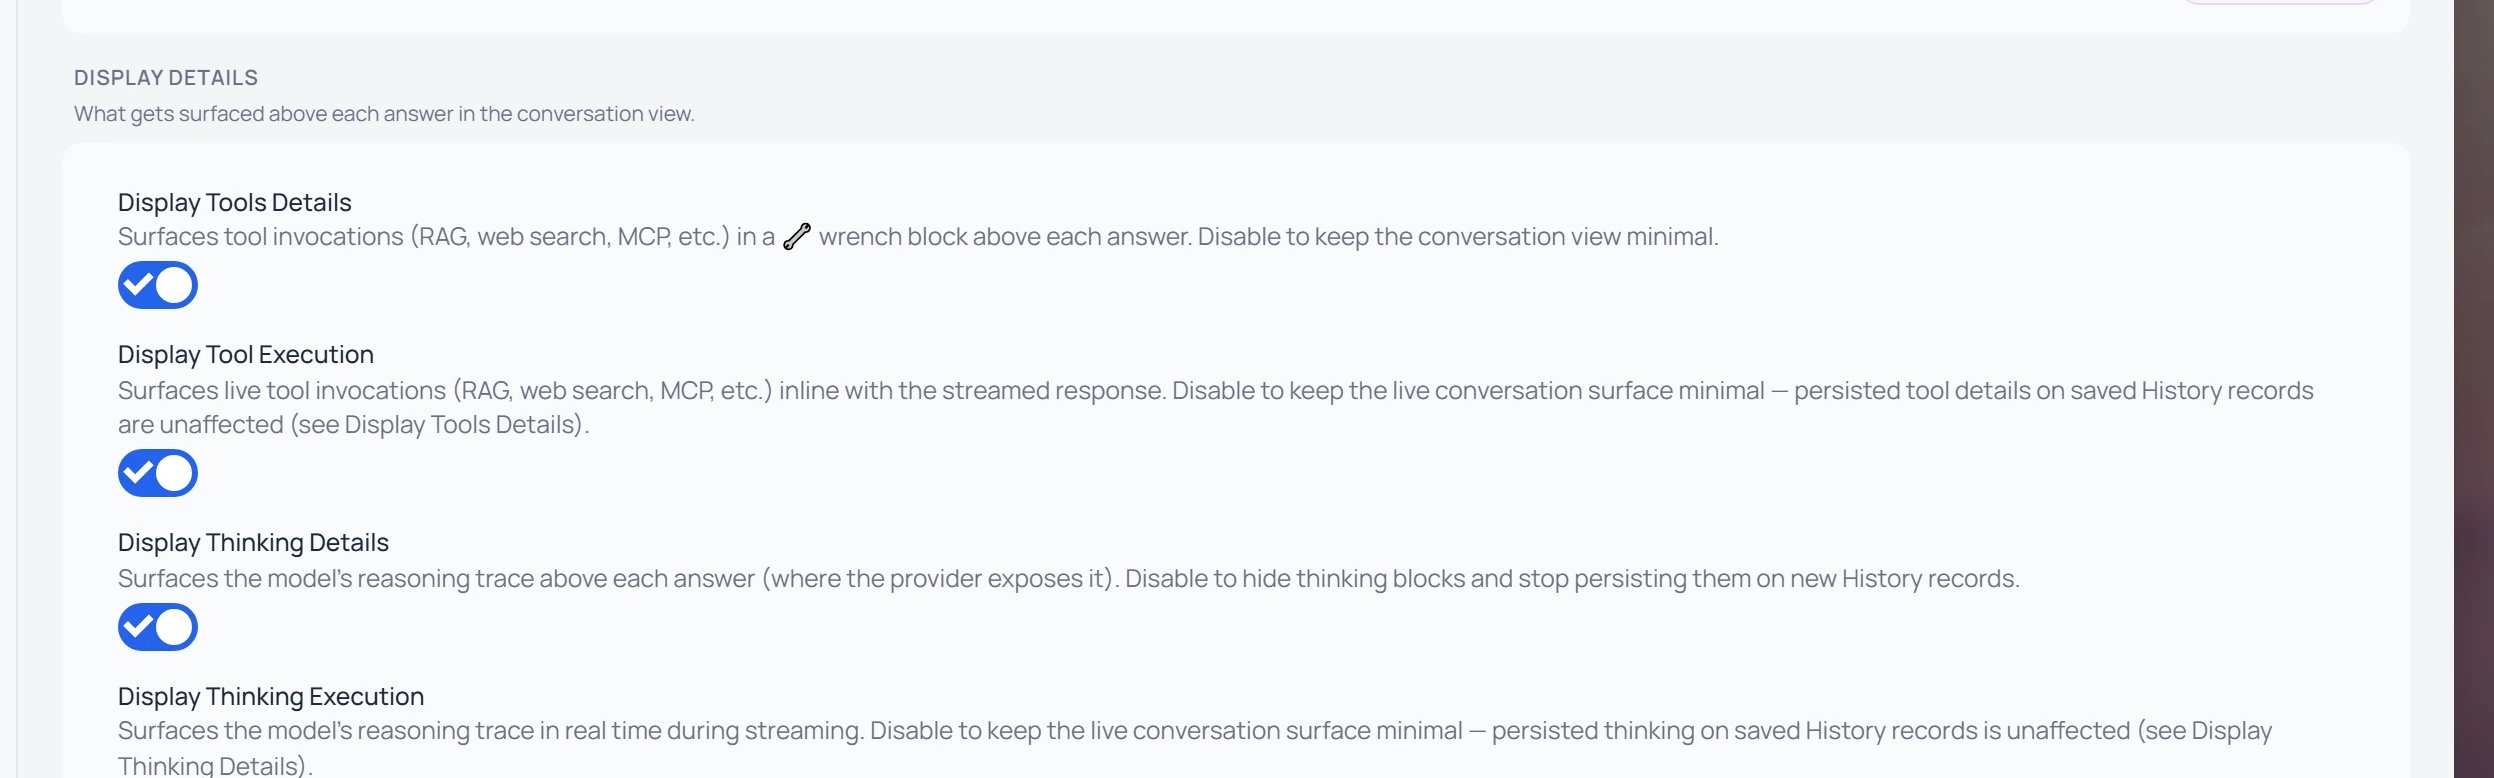
Tool execution display
Pria tells you what tools the model invoked (web search, vault retrieval, calendar, image generation, etc.). Two independent toggles, again under Personalization → Display Details:- Display Tools Details — shows a wrench block summarising tool invocations on saved answers. Disable to hide tool details from the conversation view.
- Display Tool Execution — shows live tool indicators interleaved with the response as it streams (“Running…” → “Ran ✓”). Disable to keep the live view minimal; persisted tool details on saved answers are unaffected.
Voice and realtime preferences
Found in the Voice panel. Set up how Convo Mode — the speech-to-speech experience — behaves for this Digital Twin:1
Pick a Convo Mode model
The Convo (Speech-to-Speech) Model dropdown lists every realtime-capable model available to this instance. Different providers offer different voice characters and latency profiles.
2
Pick a voice (where supported)
Providers that ship multiple voices show a Voice selector — pick the one that best fits your Digital Twin’s persona.
3
Tune audio behaviour
Per-provider extras (such as silence detection, turn-taking sensitivity, or output audio sampling) appear under the voice selector when the chosen model supports them.
Picture upload
Found in the General panel. The Digital Twin’s avatar is its own upload button — there is no separate “Change picture” button next to it.1
Click the avatar
Click the circular avatar at the top of the General panel. A camera icon appears on hover to confirm it is interactive.
2
Choose or crop the image
The picture upload lightbox opens. Pick a file, drag it in, or paste from your clipboard, then crop to the round frame.
3
Confirm
The new avatar replaces the old one for every member of the Digital Twin as soon as the upload completes.