Managing assistants requires the
assistants.list, assistants.add, assistants.edit, or assistants.delete entitlements. See Entitlements for details.Assistant List
The Assistants tab in the Admin dashboard shows all assistants for your institution.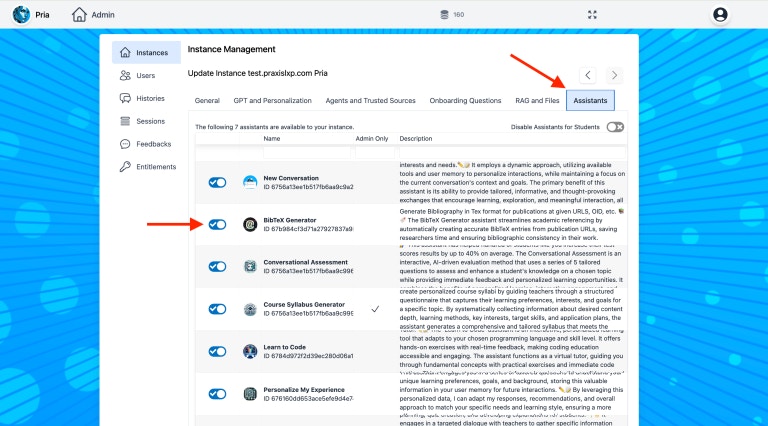
- Name and description
- Status toggle — Enable or disable the assistant for users
- Sharing indicator — Whether the assistant is shared with all users or admin-only
Creating an Assistant
1
Open the Assistants tab
Navigate to the Admin dashboard and select the Assistants tab.
2
Click Add
Click the + Add button to open the assistant editor.
3
Configure the assistant
Fill in the assistant details:
4
Set visibility
Configure who can access the assistant:
- Shared — Available to all users in the institution
- Share across Account — Also available to users of every Digital Twin under the same parent account
- Admin Only — Only visible to administrators
- Editable by Others — Allow non-admin users to modify the assistant’s instructions
When an assistant is first created, restrict it to Admin Only for testing. Once validated, toggle it to Shared for all users.
5
Save
Click Save to create the assistant. It will appear in the assistant list and, if shared, in the Digital Expert Gallery for users.
Editing Assistants
Click on any assistant in the list to open the editor. You can modify:- Instructions — Update the system prompt to refine behavior
- Model override — Change which AI model this assistant uses
- Variables — Add or edit substitution variables used in the instructions
- Visibility — Change sharing and editability settings
- RAG & Tools — Configure collection scoping and per-assistant tool access
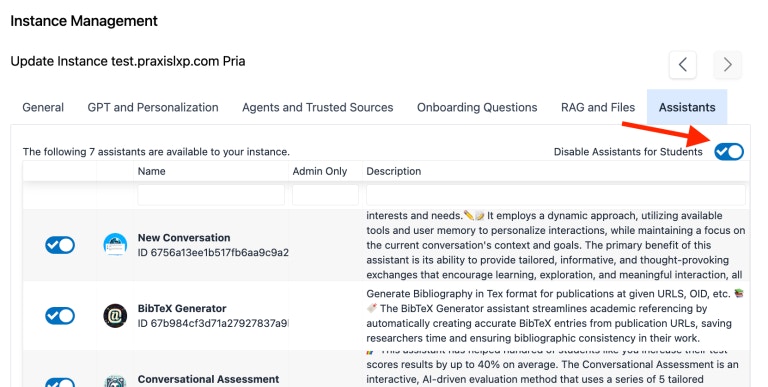
Enabling and Disabling
Toggle an assistant’s status to control availability:- Enabled (blue toggle) — Assistant is active and available to users
- Disabled (gray toggle) — Assistant is hidden from users but preserved in the system
- Temporarily removing an assistant during maintenance
- Hiding seasonal or event-specific assistants when not needed
- Keeping draft assistants saved but not yet available
Variables in Assistants
Assistants support substitution variables — placeholders like${variable_name} that are replaced with dynamic values at runtime.
Common uses:
- API endpoints or webhook URLs
- Quiz IDs or course identifiers
- Reusable instruction snippets shared across assistants
- Sensitive data (API keys, tokens) that should not be embedded in the prompt text
Model Override
By default, assistants use the institution’s configured conversation model. You can override this per assistant to use a different model — for example, a more capable model for complex analysis tasks or a faster model for simple lookups. The model override is set in the assistant editor under the Model field.If a deprecated model is assigned to an assistant, the system will fall back to the institution’s default model automatically.
RAG Collection Scope
By default, assistants search across all selected uploads (documents) in the IP Vault during RAG retrieval. You can optionally restrict an assistant to only search within specific collections — subsets of your uploaded documents.1
Open the assistant editor
Navigate to Assistants and click on the assistant to edit.
2
Go to the RAG & Tools tab
Click the RAG & Tools tab in the assistant editor.
3
Select collections
Use the RAG Collection Scope multi-select dropdown to choose one or more collections. You can select multiple collections — the assistant will search uploads from all selected collections.
- Type to filter collections by name
- Click a collection to add it to the selection
- Click the × on a selected collection tag to remove it
- Leave empty to search all collections (default behavior)
4
Save
Click Save to apply the collection scope.
Collections are managed in the IP Vault. Organize your documents into collections first, then assign relevant collections to each assistant.
Per-Assistant Tool Configuration
By default, assistants have access to all enabled tools for the institution. You can restrict which tools an assistant can use and optionally override tool instructions per assistant.Tool Mode
Use the Tool Mode dropdown to select how this assistant accesses tools:
When you select Selected Tools Only, a list of all active tools appears. Each tool is shown as a card with:
- Checkbox — Toggle the tool on or off for this assistant. Only checked tools will be available during conversations.
- Instructions Override (optional) — When a tool is checked, a text area appears where you can provide custom instructions that replace the tool’s default instructions for this assistant only. Leave blank to use the tool’s default instructions. A preview of the default instructions is shown as placeholder text.
1
Set Tool Mode to Selected Tools Only
Change the Tool Mode dropdown from “All Tools” to “Selected Tools Only”.
2
Check the tools you want to enable
Browse the tool list and check the checkbox next to each tool this assistant should have access to. Unchecked tools will not be available to the AI during conversations with this assistant.
3
(Optional) Override tool instructions
For any checked tool, enter custom instructions in the Instructions Override text area. These replace the default instructions sent to the AI when it considers using this tool.
4
Save
Click Save to apply the tool configuration.
Instruction Override Use Cases
- Restrict a tool’s scope: Override
call_raginstructions to say “Only search for budget-related documents” - Add domain context: Override
get_browserinstructions to say “Always search within medical journals” - Change tool behavior: Override
save_to_fileinstructions to say “Always save as markdown format”
Gallery Integration
Shared assistants appear in the Digital Expert Gallery, where users can browse and select them. The gallery displays:- Assistant name and icon
- Description
- A quick-start button to begin a conversation with the assistant
Required Permissions
Related
- Building Assistants — CRISPE methodology and development lifecycle
- Variables — Substitution variable guide
- Digital Expert Gallery — User-facing assistant selection
- Entitlements — Managing assistant permissions
- AI Models — Model selection and configuration
- Tools Reference — Complete list of available AI tools
- Connector MCP — MCP server integration